
Descargar la aplicación


Servicios al cliente
Sobre nosotros
Copyright © 2025 Desertcart Holdings Limited
Descargar la aplicación


✨ Elevate your kitchen game with a weekend countertop glow-up! ✨
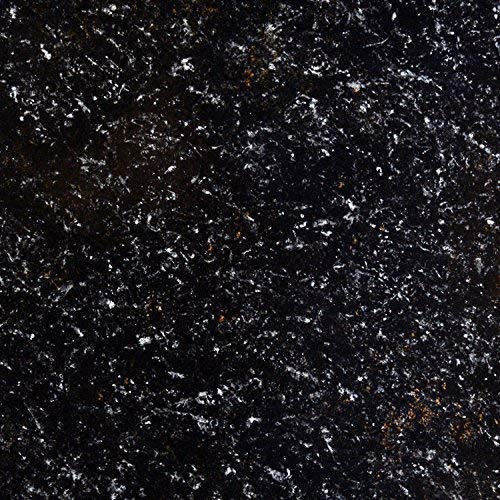
The Giani Countertop Paint Kit in Bombay Black offers a professional-grade, budget-friendly solution to revamp your countertops with a natural granite look. This all-inclusive kit features a 3-step application process, covering up to 35 square feet, and delivers a durable, washable, high-gloss finish suitable for a variety of surfaces. Ideal for DIY enthusiasts aiming for a stylish kitchen upgrade without the hassle or cost of replacement.
| Brand | Giani |
| Color | Bombay Black |
| Finish Type | Gloss |
| Item Volume | 16 Fluid Ounces |
| Size | 1 Count (Pack of 1) |
| Special Feature | Washable |
E**8
Awesome, low-cost solution
This is SO EASY to use! Our old house had solid off-white, low-quality laminate counters that were original to the house (1988) and they were just ugly. I wanted to make the kitchen look better, but I didn't have a lot of money. After hearing about this product and reading tons of online reviews, I gave it a shot. It's amazing how well this worked! I had more than enough in one kit to do our bathroom counter as well as the kitchen (granted, neither had much counter space). We also painted the cabinets (with Nuvo paint in the kitchen) and the walls in both rooms for thorough makeovers, and the results were amazing! The bathroom was the nicest room in the house - the counters looked fantastic. This product is time-consuming, but extremely easy to use. When we sold the house a couple of years after updating the kitchen and bath, the realtor couldn't believe the countertops had been painted and not replaced entirely. The bathroom counter came out nicer than the kitchen, but that's all on me. I wanted a counter with more brown in it in the bathroom, and more white in the kitchen. I had a hard time getting the effect I wanted in the kitchen, but I also didn't take as much time with it as I should have. I always cleaned it with a mixture of vinegar and water using a paper towel or a washcloth, and I didn't have any issues with it. These aren't complaints about the product itself, but rather a couple of observations/notes -- . Be patient. This will take a very long time, especially if you have a lot of counter to paint. It took me a whole weekend to do each room, but most of that is drying/curing time. Obviously sponging the colors on is the most hands-on part of it - don't rush through it, or it'll look bad. And follow the instructions for drying/curing times to make sure everything sets. . Note that you're not really supposed to use the counters for a while (two weeks maybe? It's been a while, so I forget) after finishing the project, to allow the paint time to cure. I wasn't concerned about the bathroom because we don't put anything heavy on it, but for the kitchen, I did it the weekend before we left for vacation, so the house was empty and the counters weren't used for 10 days or so. . Test out the technique before you commit to anything. I practiced for the bathroom, and it came out great, but for the kitchen, I just figured i already knew what I was doing after having done the bathroom. I wish I'd practiced more before diving in. Really, I wish I'd painted over the whole black primer coat with white acrylic before sponging on the other colors, because I ended up having a lot more black showing than I'd wanted. . It's paint -- it WILL scratch/peel. You need to use a cutting board all the time, because even a slight nick in the paint can start peeling. We had some scratches and small places that began to peel, mostly from the cats jumping on/off of the counters. I used several more coats of the clear coat (and when I ran out, I just used clear acrylic paint, which didn't work nearly as well) to "fix" it. . Do not set hot pans on the finished product.
B**Y
Brightened up my black formica!!!!
First off, this was by far the scariest DIY I have ever done, because let's be honest, its quite permanent! So, I will include the black formica picture I had originally in the kitchen, and then the Sicilian Sand transformation. I really wish I would have found this paint a long time ago. Now that I have lighter counter tops, the whole kitchen/dining is getting a face lift! I built my house in 2010 and dark trim and accents were really "in". Well, at least I thought dark was in. I started this process on a Thursday evening and did not use my counter tops again, until Sunday evening. So PLAN AHEAD! This is definitely a process, but totally worth it. I started with my island and have yet to the do the L-shape around the back of the kitchen by the stove and sink. I figured if I completely messed it up, I could just replace that island piece (because if I had money for new counter tops I would have bought them). So Thursday night around 8pm, I used an SOS pad and scrubbed the countertop really well. I wiped it down with a wet paper towel twice, then a dry one after that. I put the black primer on with the roll brush provided, and wa'laa. Let that dry until Friday night, then I started with the colors. So nervous. HINT: if you want more a tan countertop use the tan and gold colors more concentrated and then accent with the white. I was a tad nervous so I didn't really apply the tan/gold like I should have. Therefore my counter tops look whiter than I would have liked them to be, but I can really focus on the tan for the L-shape I have yet to do ( I don't think the different shade will look all that bad). Some people's islands are a completely different color on purpose! Ha, the "in" thing. I will say that it is hard to go back in steps. Meaning, if you have more black showing than you would like at the end, it looks weird to go back over the white color with the tan. Cut the sponge like it says and use the rough side! The sponge was really hard to cut, maybe my scissors weren't sharp enough, but I struggled to get 3 even pieces. Anyways, I twisted my hand and wrist as I dabbed the paint on, so there wasn't a pattern. All the colors can go on one after the other. Then you let that dry (I let mine overnight). HINT: I put NOTES all over the kitchen, because I would be the first person to put something on the counter!! The next morning, I got 600 sand paper and sanded it about 3 times! I would sand and then vacuum the counter top, and repeat. There will be places a tad higher in paint and you really want those to be level with the rest of the paint. I think the sanding made the paint look more natural too. I applied the poly. It was so easy to apply with the roller. Like when you paint a wall, make sure the roller evenly spreads the poly so you don't get more gloss in an area. I did 3 coats (which they say is MAX), 2 is recommended. I can see in one spot on my counter where the poly wasn't even and the shine is more dull there, but I can live with it. (in the 4th picture you can see the horizontal less shiny part). The surface after the last poly has dried, is not completely smooth/flat (tried to include that texture in the 5th picture) It has a bit of a texture, but doesn't bother me a bit. Then we went out of town for the weekend, through Monday night. 3 days to cure!!!!! Got back that evening, and I have been using the counters the last 2 weeks, and I still walk in the kitchen forgetting how much I love them. I have set all of my appliances, pots and pans, cutting boards, etc down on the counter, and they are solid and no scratches! I can't wait to do the L-shape! My best piece of advice, give yourself time. I am not a DIY expert but I do enjoy projects. Don't rush this one and you won't regret it. The instruction booklet is an easy step by step---simple. The sponges and rollers clean up really easily with warm water. Note: I do not have a formica backsplash, I took it out a few years ago when we got a tile back splash, so I cannot comment at all on how easy/hard it is to do the 3 inch back splash. GOOD LUCK, I don't think you will regret buying this product. Also, I found this product at Home Depot, and it was $1 more, so if you have Amazon Prime, buy it here!!!!
M**R
Beautiful results, easier to do than expected!
I was a little scared to try this product; it looked so easy and actually looks like granite but is it really that easy to do?? In short, yes. I did this over two days and it turned out beautifully. There were challenges since I painted an existing bathroom vanity with two sinks and decided not to remove the sinks (just taped them up really well to prevent accidents); in hindsight, it would have been easier to move the sinks out of the way first so if you're contemplating this and have sinks in the way, my advice is to go ahead and take the time to remove them. Almost everything you need comes in the box; the only additional items you will need are either a stout Brillo pad (if doing laminate or Formica) or some fine-grit sandpaper (if painting on metal or wood), a caulk remover and denatured alcohol to scrub away the remnants of caulk (if not a new countertop), painter's tape, sponges, silicone caulk, and perhaps a small paintbrush. I used a 1" paintbrush and it worked well to get into the corners and turns around the sink and the top of backsplash. Another very useful tool is a pencil and twist tie (I'll get to that later!) The primer coat went on with no issues. I did not anticipate the long wait time for it to dry (8 hours!), so that slowed me down just a bit. Not really a problem, just a delay I didn't anticipate. Keep your brush and roller handy (wrapping in a plastic bag and sticking them in the refrigerator to prevent them drying out really helps) because no matter how carefully you paint the first coat, there will be spots that need touching up! I checked the countertop after it was dry to the touch and touched up a few spots, then allowed to dry the remainder of the recommended time. The directions advise cutting the included sponge into 4 pieces, but I would recommend also cutting 2-3 small thumbnail sized pieces off to use to get into the small places the bigger sponge won't reach, such as the crease between the countertop and the backsplash and the top of backsplash close to the wall behind. I used the small pieces of sponge and wrapped them around the end of a pencil, and secured with a twist tie (bread tie), and it worked beautifully to give an even coverage. There are 3 colors to be sponged onto the black primer. One mistake I made initially was not covering the countertop with enough "sponging", especially in the first color. It's a matter of personal taste, of course, but I would recommend sponging well so that only very minimal black shows through the base color for the most realistic look. The additional colors should be used in gradually- reducing amounts, as they are more highlight colors and are sponged on top of both the primer and first "sponge" color. After all the colors are sponged on to your liking, use the left-over 4th sponge to dry-sponge over the entire surface to blend the colors a bit. Don't oversponge... it's harder to fix (learned that the hard way!) than doing minimal sponging and working up to how you'd like it to look. Again, this is personal preference but over-sponging will give a blurred look. If this is what you're after, sponge away! If not, I would suggest dry-sponging a bit then taking a step back to get an overall view of how it looks. After another 4-hour dry time, the clear topcoat goes on. It's amazing how realistic that sheen makes the countertop look! The directions recommend 2 topcoats with a 4-hour dry time in between. I am considering also putting a clear epoxy marine coating on top as well, to help protect against scratches and water splashes. All in all, it was very easy to do and turned out really well. I highly recommend if you want the look of granite without the weight and the expense.
W**A
Beautiful Results but Top Coat is Challenging UPDATED
UPDATE 1 YEAR LATER: Still holding up 95% beautiful, except right at the edge of the kitchen sink. We had one rub spot with a chip where we touched up and added another 2 coats of the Polycrylic. Just do that in any high traffic spot from the get go and its all good. Really did totally transform my kitchen in house we are just moving to with 70s white countertop and now they look fabulous. Laying down the layers was the easy part, but the top coat sealant is the hardest part and the easiest to mess up in a big way. The kit does not include nearly enough of the polycrylic top coat to give it a proper hard coat shine and the instructions do not really tell you how to avoid the streaks and bubbles that come with using that type of roller brush on polycrylic. Even using a good quality brush caused bubbles. I bought an additional quart of polycrylic to complete my project and had to sand in between each coat to remove the teeny tiny bubbles they came from that brush included in the kit. My final coat turned out like glass though because I learned by trial and error that you need to use a wide foam brush and you cannot apply any pressure whatsoever. Pressure introduce air and this stuff is not self leveling like epoxy. You need to only put the product on and guide or pull it from one place to another - Do not paint or brush at all - no pressure or streaks and bubbles. Apply only a 12 by 12 inch area at a time and overlap by at least one and a half inches to avoid lap marks. I kept the brush at a complete 90 degree angle and did not press down at all but only guided the wet material along. Polycrylic drys at an incredible rate so must be worked immediately. Also you must not over apply or it doesn't dry correctly so smoothing on super thin layers without bubbles or brush marks is a talent. You MUST allow this to dry completely before removing painters tape (score with exacto knife or it will pull away the Poly) All and all this kit made my counters look really beautiful so I'm happy with that so far but only 4 stars due to the top coat difficulty. We will probably end up putting the epoxy coating on top though as I've heard polycrylic doesn't hold up quite as well but you can't use epoxy on vertical surfaces and my countertops have curved edges and lips, so the trick will be how to apply epoxy to most of the top? Project for another day.
D**L
Countertops look great after one month!
I spent a long time debating about painting my laminate countertops. They were grayish marble colored and had a texture to them and I just wasn't sure if I was making a huge mistake. So far, I think it turned out better than I expected. First of all, I chose the Bombay Black. This is a paint-only version of the countertop paint - there are other versions with little chips and flecks to sprinkle on it. I decided that there was too much risk of a large mess with those versions, and they seemed to have many more steps than the paint-only version. Here's what I did... 1. Watched the DVD three times and tried doing some practice painting on the included black paper and then my own black paper to perfect my technique. Later I wished I had done less practicing because I used up a lot of paint doing that. 2. Removed the caulk, taped off the sink, walls, and cabinets, and other general paint prep. 3. Cleaned the countertops down with soap and water and rinsed them off three times as suggested. Then I followed that with a wipedown with rubbing alcohol as recommended somewhere online - I have no idea if that helped, actually. 4. Painted the primer coat and let it dry. You will notice I did not say I sanded it first - I did not. I did not sand it after the primer coat either. 5. I started dabbing on the white pearl paint with the sponge. I thought I would get creative and also use some silver acrylic paint as a second color rather than the included bronze but to be honest the pearl and the silver spots look just alike in the end - the pearl paint is very shiny. 6. Then I dabbed on the Onyx paint. This was the hard part for me because I was trying to get roughly the same look on all the countertops in my kitchen but because some were deeper than others it was hard to reach everything equally - I found I dabbed more where it was easier to reach. All the practicing did not really pay off because in the end, reaching across three feet of countertop is very different than a 8" sheet of paper. 7. Again being creative I blew some fine silver glitter on mine in some places while the paint was still wet. I think this turned out very nice and you can definitely see the sparkle. 8. After that was dry I put on the Polyurethane coat. I had sort of expected that most of my texture would be eliminated by the Polyurethane and I would end up with a fairly smooth finish. This was not the case. I ended up using up my whole can of Polyurethane and a second can I ordered separately AND a third, larger size can of "one coat polyurethane" I bought at the hardware store... allowing four hours minimum drying time in between coats... but I ultimately ended up with a shiny mirror finish which was the goal. I did not sand at any time. I found the paint to be easy to apply and I did not make a mess. I was EXTREMELY gentle on the countertop for about the first three days after the last coat of polyurethane. I did not set anything cold, hot, wet, sharp, or heavy on it during that time. After that I was fairly gentle for another week - I did get it wet sometimes but wiped it up quickly and I was careful not to set anything sharp on it. A word of warning - when it gets wet the poly will cloud up, but that will go away once it is dry for a few minutes. This is normal while the polyurethane cures, which can take up to 30 days. Now, you don't have to baby the countertops that whole time, just be aware that it might get cloudy when it is wet until it fully cures. I did my final coat about 36 days ago and the beginning of this week I noticed it was no longer getting cloudy if I left a wet dishrag on it. Now of course, how it looks is important but it is not the main thing - it has to be durable. Before writing this review I scanned the countertop with a flashlight and confirmed there are no scratches - not even small ones. It seems to be holding up very well. I think I have successfully postponed buying new countertops for at least another few years.
T**E
AMAZING PRODUCT!
The Giani Granite Finish is an amazing product. If applied correctly, to a clean surface, it is also very durable. Even though the instructions say that sanding between applications is not necessary, you should always lightly sand between coats, when painting just about anything. This ensures that the top coat will adhere to the layer beneath it. The top layer is not going to stick to a glossy undercoat, and will eventually just chip, and peel away. I think this is the biggest cause of the "peeling" that some people claim they are experiencing. I followed all of the drying times between coats, per the instructions, but also lightly sanded with very fine grit sandpaper between all coats ( including primer, paint and clear). I also allowed for the full 14 day curing period before setting ANYTHING on the counter top. The paint, and clear coat both need plenty of time to cure, and harden, in order to be durable, so don't be impatient with this final step. It is important. I used 3 coats of clear coat (sanding in between each coat), and it dried smooth, and hard as a rock. Also make sure you seal all of the gaps, and edges with Silicone, so that water does not get underneath the surface, and lift the finish. I used a lot of the white color in my counter design, and feathered the edges, so the countertop came out looking more like cut marble, or quartz, than granite. It looks incredible. I also purchased some extra bright metallic gold paint to make veins with, which added to the realism. The project takes some time, and patience, to do correctly. Do not rush it. With the application, and drying times in between coats, plan on spending an entire weekend on this project. Starting on a Friday night, and just letting the primer set up all night is your best bet, since that requires the longest dry time. I have had my Giani countertop for about 6 months now with no issues at all. I make sure to not let water puddle on the counter, and wipe up spills right away. I only use dish soap, and water for everyday cleaning, and I also use the Giani Countertop cleaner about once a week, or so. It keeps the counter looking shiny, and new. Also keep any hot pans away from the countertop, as it will soften, and melt, the new surface. I did drop a very heavy pointed object on the counter, and made a very small chip (my fault, not Giani's). I filled in the chip with some left over paint, and covered that with clear fingernail polish (my girlfriend's, not mine). You cannot even tell that there was ever even any damage at all. I learned the fingernail polish trick from years of working on cars. The stuff is very durable. Overall I am very please with how the counter turned out. Along with the Giani Coountertop, I used Vinyl, peel and stick, SMART TILES for the backsplash. They look just like Mosaic Glass tiles. I have had many people come in my kitchen now, and ask, " WOW, how much did you pay for all of that?" due to the fact that it looks so much like real marble/granite, and glass. The only difference is that I paid about $350 for the entire project, and not the $3,500+ that we were quoted for the "real thing." If you are not so vein, that you need the real granite, and glass, then these 2 products together are just amazing. We will see how durability is over the long run, but so-far-so-good. A little common sense goes a long way in taking care of the countertop. Just treat it as you would any other expensive granite, quartz, or Corian type countertop, and you will be fine. I would definitely recommend purchasing this product, and trying it out. If you have a little patience, and artistic flair, the results will be amazing, and so will the money that you save!
J**E
Does what it says it will, but do not recommend for those with a low threshold for frustration
Like everyone else who orders this product, I was looking for an inexpensive way to change the look of our perfectly fine, but outdated, countertops. I had considered using Giani for a couple of years, but had always been too nervous to try because I was afraid I'd mess it up. I thought probably just purchasing new counters would be the safer route, but the idea of saving hundreds or thousands of dollars was appealing. Finally, I decided to go ahead and give this kit a try - I figured the worst that could happen was that I'd mess it up, and have to buy new counters anyway. Ultimately I'd only be out $80 and some time. What I didn't realize until I went to order was that the total cure time was 14 days. I had an event planned in just under 3 weeks, so knew I'd need to start immediately. I ordered the kit on a Monday and received it on a Wednesday afternoon. The first step was easy - I taped and primed the counters on a Thursday. On Friday, I started the mineral paint. This went fairly easily on the larger, horizontal surfaces. I was careful to make patterns that looked natural across the tops. Where I ran into difficulty was in the corners and seams where the backsplash piece meets the counters. Ours are at 90 degree angles, and it is impossible to work a sponge into them, and also difficult to run along the top. I kept cutting smaller and smaller pieces, but ultimately had to use a brush. I didn't have the best type on hand (because I didn't realize I'd need them or that the type mattered all that much). This was VERY tedious, and I am not 100% happy with how those areas look, because using a brush does not create the same texture/pattern as a sponge, even with blending. It looks inconsistent with the look of the counter surfaces. And trying to work natural looking patterns in went out the window here. Perhaps others won't notice, but I do. The area between the sink/faucet and the backsplash was also extremely difficult to get to with either a sponge or a brush. It would be nice if the kit included some sort of small space tool to help with these areas. Anyway, after nine hours of working with the mineral paints on Friday, and another 3 hours of touch ups on Saturday morning, I still wasn't satisfied with those areas, but had to move on as I was running out of time against the 14 day cure period. It was never going to be perfect, and I figured most of the backsplash is not visible as it is blocked by appliances, etc., anyway. I don't like it, but will live with it. I moved on to the clear coat. This is where things really started to go south. I waited four hours for the paint touch ups to dry, and started the clear coat late on Saturday afternoon. I sanded and wiped everything down. I watched the videos several times, but still managed to screw this up. We have a large peninsula, and this area was the worst. It was streaky and there were dry spots even though I tried to be careful with rolling. I am not experienced with applying clear coats to anything, which didn't help. It isn't like paint. I was annoyed, but figured I'd just have to sand it down and try again. I waited another four hours and started sanding in prep for doing another clear coat on Saturday evening. Unfortunately the sanding, even with a very fine sandpaper, took some of the paint off. So instead of applying a clear coat, I had to touch paint up, and then wait overnight. So I am behind my deadline. On Sunday morning, I realized that I apparently didn't rinse the roller out enough, and there are hardened areas. This obviously isn't going to work, so now I have to get new rollers and am wasting more time. I am about at my patience limit. The irony is that I don't even care about a glossy finish; I just wanted a color/pattern change. I don't need it to look like "authentic" glossy granite, and would have been fine with a more matte look, but that isn't how it comes. Ultimately, I give this product 3 stars. It does what it is supposed to do. My 90s counters are updated and for the most part look good pattern-wise. However, this has been the MOST FRUSTRATING DIY project I've ever worked on. I am unhappy with the back splashes and seams. And the clear coat still isn't done. Some of it is user error as I am not experienced in working with this sort of thing and didn't always have the right tools on hand. Unless you are experienced, or unless you have a high threshold for imperfections and frustration, and a lot of time and patience, think hard before using this product. UPDATE: Three days later - after sanding and recoating the peninsula a couple more times, and being very, VERY careful, it still looked uneven, with lap lines and dry spots. I had to order more clear coat. Sanded again, touched up paint again, recoated again a little thicker this time. There is a slight improvement, but I can still see lap lines and spots. I do not have any more time to waste on this. After nearly a week, my family is tired of not having kitchen counters to use. Giani needs to consider changing the clear coat formula to make it easier to apply to large areas. Perhaps it just dries too quickly. I will just have to live with the streaks. My review remind three stars.
S**I
Turned out GREAT!!!!
My fiancé and I just bought our first house in July, but were delayed for months with the pandemic. During that time, I did my research and felt fairly confident that I could transform the red Formica counter into something more my taste. And for under $100, if it didn’t work out, it didn’t work out. I watched video after video, perused reviews on here, and bought the kit long before we had the house keys. I could not wait! but when it finally came time, I had some doubts in myself. I am fairly artistic, but I honestly don’t think one could mess this up. What I would recommend doing, however, is taking a picture of each section after each color so that you can mimic the amount of each color used in the next section. For my first two sections, I didn’t do that. They both came out beautifully, but they didn’t look like the same counter. Luckily with some sanding and priming again, I was able to redo those two sections. By the end, it felt seamless. I think the photos speak for themselves. My kitchen looks brand new and I am sooo happy with it. I also feel a sense of accomplishment and pride, which may be the best part of it all. To make it exactly what I wanted, I bought new Amazon Basics hardware, which is absolutely beautiful as well as affordable. My ONE regret is that, in my months of research, I read a lot on here about using epoxy for extra shine. I read on various websites and message boards about how tricky epoxy can be to use. You have to be very accurate with your measurements and mixing, your surface has to be level, you have to work very quickly before it hardens, and you have to cover everything because it is “self leveling” and drips right off your surface. So for the countertops, I had to put painters tape on the sides, which I later gave a layer of the Giani top coat. I also had to use Giani for the backsplash because the Epoxy would have just dripped down the vertical surface. I tested the epoxy out on an old piece of wood with a squeegee as the instructions said and was happy with the results- smooth and shiny. Unfortunately, for whatever reason, it was not smooth whatsoever on my countertops. In fact, it’s very bumpy. I was sooo upset at first, but it isn’t that noticeable with my appliances on the counter. If you go up close though, it looks terrible. I wish I had just used the Giani topcoat. It is not super shiny but it still looks great. I eventually plan to do the flat surfaces over, but for now, it is a big improvement from what was there before. So to summarize, I would definitely recommend this product as is. It is easy to do and looks authentic. There’s no need to take a chance and mess with any other top coats in my opinion.
Trustpilot
Hace 2 semanas
Hace 1 mes