Desert Online General Trading LLC
Dubai, United Arab Emirates
Desert Online General Trading LLC
Dubai, United Arab Emirates


🛡️ Seal it once, seal it right—ultimate protection that lasts!
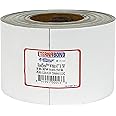
EternaBond RoofSeal White is a 4" x 50' microsealant tape with a robust 35 mil thickness, engineered for durable, waterproof, and airtight repairs on RV roofs, metal buildings, boats, and more. Featuring advanced MicroSealant technology and a UV-stable backing, it remains flexible in extreme temperatures down to -57°C (-70°F) and bonds to a wide range of surfaces without requiring additional sealants. This one-step, mess-free tape delivers professional-grade protection against abrasion, corrosion, moisture, and air infiltration.


| Brand | EternaBond |
| Color | White |
| Material | MicroSealant Adhesive Tape |
| Number of Items | 1 |
| Recommended Uses For Product | Multipurpose |
| Special Feature | Durable |
| Product Dimensions | 600"L x 4"W x 0.04"Th |
| Surface Recommendation | Metal |
| Water Resistance Level | Waterproof |
| Size | 4" x 50' |
| Item Thickness | 0.04 Inches |
| Tensile Strength | 50 Pounds |
| Compatible Material | Wood, Aluminum, Alloy Steel, Metal |
| Unit Count | 50 Feet |
| Global Trade Identification Number | 00891991000533, 00700115575805 |
| Manufacturer | EternaBond |
| UPC | 700115575805 891991000533 |
| Model | RSW-4-50 |
| Item Weight | 3.5 pounds |
| Item model number | RSW-4-50 |
| Is Discontinued By Manufacturer | No |
| Exterior | Smooth |
| Manufacturer Part Number | RSW-4-50R |
| OEM Part Number | RSW-4-50 |
| Special Features | Durable |
S**K
Worked Fantastically
The roof of my enclosed trailer started leaking. The 12 year old factory sealant used under the trim had finally given up.After removing all the trim I found how poorly the trailer was constructed. They used rivets every 8-9 inches or so which left a lot of the aluminum skin buckled up; and would have been difficult, if not impossible, to seal. I added a couple hundred additional rivets to make everything smooth, then cleaned all the areas that were going to receive the Eternabond tape. Application is straight forward and easy. Be warned, you need to plan ahead, have a helper if you need one, you only get one shot at placing the tape. After you get it down give it a good rolling. It also worked great on the top-to-side 90° transition; just place it on one surface, roll it to adhere it, then fold it over and roll some more.Pro's: Ease of use, durability, adhesion, quality. This will forever be my goto solution for trailer roof leak repairs.Con's: None really. There is a learning curve to using it but if you've got two brain cells to clank together to make a spark you'll be able to figure it out.
S**K
Wow impressive product!
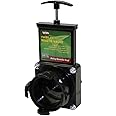
I bought a used enclosed snowmobile trailer this winter. The roof was covered with snow but looked good from the inside. The first hint of a problem was the first time I washed the trailer. I noticed soap suds and water streaks running down the inside walls. I grabbed my ladder and the problem was evident immediately. The original silicone seam from the manufacturer had developed stress cracks over the course of 10 years. It was a nice wide silicone seal about an 1 1/2 wide and surprisingly thick. The previous owner had tried to reseal some of these areas with clear silicone and in other areas with what appeared to be some sort of epoxy resin. It may have worked for awhile but the end result was a failure. I would have loved to reapply a silicone bead to the seam but there was no way I could match how it came from the factory. I honestly have no idea how they got the bead of silicone to be so uniform and wide. My initial research led me to a product called dicor lap seal. I cleared one side of trailer of silicone with a razor blade initially and a wire brush attached to my drill to clean the rest. I purchased the dicor lap seal specifically because it was self leveling. I was hoping I could apply a wide bead and it would self level enough to approach the width of the original silicone seal. It was apparent after about an hour after the application that it was no where near the width or thickness of the original seal. The lap seal worked well and it was free from leaks on that side of the trailer but I could tell it wasn't going to last that way for long. I needed something wide to bridge the gap between the upright walls of trailer and the roofline. I did some more research and that's when I found this product. I had enough faith in the product after reading some other reviews here and other sites that I removed all the new dicor lap seal with the same process as the silicone removal. I also removed all the other silicone from the trailer roof. I was a little nervous working with a new product that I had such high expectations from. I started with the back of trailer first because it was the shortest side. I started to enroll the tape in about two foot sections and would remove the plastic backer along with it. I applied the tape evenly, first to the top of the upright wall, and the remaining onto the trailer roof. I would press lightly at first to make sure the tape was where I wanted it. I could remove the tape and reapply with great effort if I had to at this time, which I did do several times throughout the entire project. Once I was satisfied with the placement I rolled the tape with the Eternabond 2 pound roller that I had purchased too. This process was quite simple and the bond afterward was impressive to say the least. I tried to pull a section of the tape off after rolling it just to see how well it adhered. The closest example I can think of that you maybe able to relate to is trying to remove a piece of embedded gum from carpet. This stuff sticks end of story! When I got to the end of the roof I took a scissors and cut the tape off evenly. I overlapped the tape on the ends rather than butt them for what I considered a better waterproof seal. It has rained quite a few times with a few thunderstorms in the mix and thus far no leaks whatsoever. The next test will be to see how it fairs over the winter months. I will try to do an update next spring to see if any leaks occur. There is one thing I would have done differently. I should have purchased the 4" wide tape. It wasn't that much more money and it would have given me an extra two inches of waterproof sealing power. I was concerned the 4" tape would be too hard to work with but I would have been fine. I will be keeping this product on hand. I liked working with it that much and I can use it on a variety of things.
A**.
Seals extremely well.
Possibly the greatest tape I've ever used. Works perfectly for sealing RVs especially. I've bought 5 packs of this stuff already. Highly recommend.
R**.
Minor RV Leak on Roof. Now no longer.
Had a minor leak on my RV roof and could see it was were there was slight cracking of the sealant around the air conditioner. I used this roofing tape and the leak is gone. Just be aware this stuff is so good that once you put it down it will not come up so make sure it is where you want it because once it is put down you are not going to pull it up and move it but that is what makes this tape so good and solves the leak because it does have such a strong sealant. It is very solid and thick tape and looks great once applied.
J**M
using it on a top corner seam
UPDATE: It is March 2018. The eternabond has been on my trailer for about two years now and all the areas where I applied eternabond are holding up very well. No breaches or leaks. I have raised this rating from 4 to 5 stars because of how practical this stuff is.I have a 1999 Northwood Nash travel trailer. It has no leaks that I know of but I can see there are some parts of the roof, notably the front and rear seams and around the front and back corners that look problematic.I researched various ways to deal with this. Most pros would probably say to take the seam apart, etc., and reseal it. That's not realistic for me right now. There are no current leaks and I am looking to shore up these problematic old caulk jobs that look about ready to fail along the front and rear seams and near the gutter.I first looked at a lot of pictures at what other people had done with Eternabond tape. That helped. There was also a youtube video made by the Eternabond company about how to apply it. That also helped because it gave me the idea to use the utility knife. And to use my fingers instead of the roller. The guy in the Eternabond video uses his fingers to apply pressure (not the roller) and he uses a utility knife to cut the tape. There is not a lot of great info out there about using it but there are a lot of pictures and some decent youtube videos. None address the issue of lancing as well as they should in my opinion.Something else about the utility knife is important which is that it can be used to easily lance any air bubbles or "tents" that occur has you apply the Eternabond. Using you fingers to smoothly apply pressure helps to identify these air pockets that can be lanced so that the microsealant can fully apply. The Eternabond website says to use a pin to pop air bubbles and describes the procedure for what to do for "tenting" and I found that also very helpful. As it shows that where it tents or bubbles, the important thing is only to lance it and smooth it over and apply another layer if necessary or to make it prettier.I am totally new to this and could be doing it wrong so I'm just going to get to the pictures ...First I noticed the trouble spot by the back rear where the caulking was breaking down and this looked like an area where it was possible for water to pool. So I made this area a priority. It is around the gutter and the gutter and the rubber strip along the gutter are in very good shape so I didn't want to cover them up.I prepared and primed the area. (Disclosure: I have some Eternaprime brand primer on order but until then I decided to prime it the old fashioned way.) So I washed the area thoroughly with dishsoap until it was about as clean as it gets with dishsoap. then I marked the area lightly where I would be applying the tape and used a little sandpaper to rough up the area. then I quickly applied and wiped off some acetone over the area. this is especially good for priming the old caulk. it is good to expose a "sticky" layer of the old caulk which if you scrape or prime some away, does appear. Note that the acetone will remove the paint also off your trailer. then I pre-meaured the strips I was going to use and planned exactly where I would place them and pre-cut the strips. I took my time and used no strips longer than 8 inches. I find that more than that is difficult to handle and to focus on applying pressure on every little bit.When I applied the eternabond tape, I pretty much put it above where I wanted it (with back peeled off) and let it kind of fall into place by gravity as I guided it laying it as flat as possible. then when it was flat, I went about applying pressure from the middle out and working out all the tents and air bubbles and I pressed on the sealant. It was very helpful to have a clean and sharp utility knife to lance tents and air bubbles. You have to really be careful with that utility knife because remember if you go just a little bit too much, you will cut into your rubber roof. Nevertheless, I used one because it worked the best.*UPDATE: I got the eternaprime primer and it was by far the best way to prime the area for the tape.This is not a how to guide because I am not sure if I am doing this correctly but by using some logic and watching some videos about how to use this, it seems pretty good. In areas where I had to lance tents or air bubbles and more tape was needed, I simply applied more tape over that area as Eternabond says to do on their website.I used:pair of nice, sharp scissors to cut the tape (clean scissors as necessary with acetone if they get gunked)utility knife (clean with acetone if it gets gunked)acetone as described abovedishsoap as described abovemy fingers to press down to ensure surface adherence (not the roller)On purpose here I did not use the tape over the black rubber or the gutter because both are in good condition with no breaches so I wanted to leave them as-is.I plan to do the three other corners of the trailer and all along the front and rear seams although for going along the entire seam, I am going to wait for the Eternaprime. I wanted to get going with this corner just to see if it would be a viable method to deal with the deteriorating caulk around this area.
Trustpilot
Hace 1 mes
Hace 1 mes