Desert Online General Trading LLC
Dubai, United Arab Emirates
Desert Online General Trading LLC
Dubai, United Arab Emirates


🛠️ Fix it once, fix it right — the ultimate fuel tank savior!
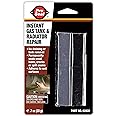
The J-B Weld 2110 Metal Fuel Tank Repair Kit offers a professional-quality, permanent solution for repairing leaks in metal fuel tanks. Designed for quick fixes without removing the tank, it repairs holes up to 3/8" diameter and cracks up to 4" long using advanced epoxy putty and fiberglass cloth. Trusted by professionals and DIYers for over 40 years, this universal-fit kit includes everything needed for durable, hassle-free repairs on gas tanks, oil pans, and more.


| Item Weight | 40 Grams |
| Fuel Type | Gasoline |
| Product Grade | New |
| Fit Type | Universal |
| OEM Part Number | JBW2110 |
| Global Trade Identification Number | 00043425021106 |
| UPC | 043425021106 |
| Automotive Fit Type | Universal Fit |
| Manufacturer | JBWeld |
| Model | J-B Weld 2110 Metal Fuel Tank Repair Kit |
| Item Weight | 1.41 ounces |
| Product Dimensions | 1.57 x 5.12 x 7.87 inches |
| Item model number | 2110 |
| Manufacturer Part Number | 2110 |
A**R
Oil tank leak fixed
Used it to stop a leak on an oil tank from a pin hole. Worked well and hasn’t leaked since. Did the repair about 6 months ago and still holding. Seems solid
R**L
Worked as intended
Worked perfectly for my application. Had a vehicle gas tank that had a small whole and are no longer being reproduced. I was able to save/restore the tank and keep the vehicle on the road.
A**S
Wanna Save Some Real $$$
Driving down the interstate and ran over a tow strap where the metal hook bounced up and put a hole in the oil pan. The stealership quoted $1,400 to replace the pan parts and labor. Ordered this J-B Weld Fuel Tank Repair Kit thinking what the heck it's worth a try. I didn't know if it would work on the oil pan made of aluminum but it did! It stoped up the hole just great! No more oil leak and instead of fourteen hundred bucks to replace a pan, the hole was repaired for fifteen.The kit comes with a small block of wax to put into the hole just to stop the leak while you prep the area around it. There's some sand paper to rough up the area around the hole to help the epoxy have something to grab. Mix a bit of the resin and hardener together using the supplied brush. Then, goop that first mixed batch over and around the hole and put some of the supplied fiberglass patch ontop of that first layer. Next, mix the rest of the packets of resin and hardener together and brush / goop it onto and past the edges of the fiberglass patch.It dried within half an hour and I was driving the car within an hour. Bumper to bumper traffic stop and go for several hours later and back home then let the car sit for a few more hours and crawled underneath and looked closely at the repaired area feeling all around for any signs of oil. Dry as can be and absolutely no more oil leak.Seriously, thanks for a fine product that saved me time and real money.
D**E
Great if the tank is empty.
Great product but not for my application. I was using this for a home heating oil tank with a slow drip. It does not bind well to a wet surface, let alone one covered in diesel. That was mainly my fault though since I should have drained it but I still had about 100 gallons left in it so the static pressure was pushing its way through the liquid JB weld and not sealing. If you're in the same predicament, I suggest their Water Weld with the blue label. Worked first try. And dont let the reviews fool you, if you mix it properly it does not set in seconds. Not sure what they're doing wrong.
V**K
Don't follow the instructions! Read this first!
This seems to be a very tough tank weld and it fixed the leak that I had (which I will describe further on), BUT, the most important takeaway from my review is DO NOT FOLLOW THE INSTRUCTIONS!!! Because if you do, you will end up with an unbearably hot, rock hard bag of glue! The glue will start curing by the time you finish mixing it in the bag! It is EXTREMELY important to first empty the black compound, and then empty the white compound beside it. I would recommend doing this on a party paper plate. And when everything is ready, start mixing the two compounds together with an 1 inch wide wood shim. If you do it my way the glue will cure in approx 8-10 min from the time you start mixing, vs approx 3 min from the time you start mixing if you mix it in the bag like the directions tell you. I know because I tried it both ways. I used it to fix a large rusted and pitted area or a John Deere 2640 gas tank, and the fix seems to be incredibly sturdy! I hope this helps somebody! God bless
M**C
Product gets hard to fast to work 2nd layer
The media could not be loaded. The stuff works great but you must be very fast. I needed for a minute as it says. It got hot and almost to hot to hold onto. Cut corner of package. Put a layer on and applied the fiberglass cloth which I had pre cut to fit. Before I could apply more over the cloth as it said, it got hard in the package. You only have maybe 2 1/2 minutes start to finish and the rest is unusable. I could not finish my repair. Dries to fast to work with it.
P**N
Works great!
Works great!
T**0
Truly works.!!!!!!!
This product helped save a 30-year-old gas tank on a log splitter. Have everything ready and sanded and cleaned and ready to go. Once you mix this epoxy up it will get hard in just a couple of minutes. Wear gloves! The pack age gets extremely hot and will flow out perfectly and will harden right up and be able to use the part in no time. Do not think you have all the time in the world to work with this product. it will harden almost immediately and will get extremely hot in your hands!Hands down a great product and will save some really expensive parts that can't be replaced easily.
Trustpilot
Hace 3 días
Hace 1 mes