

🌿 Grow Your Dreams: Where Every Season is a Blooming Success!
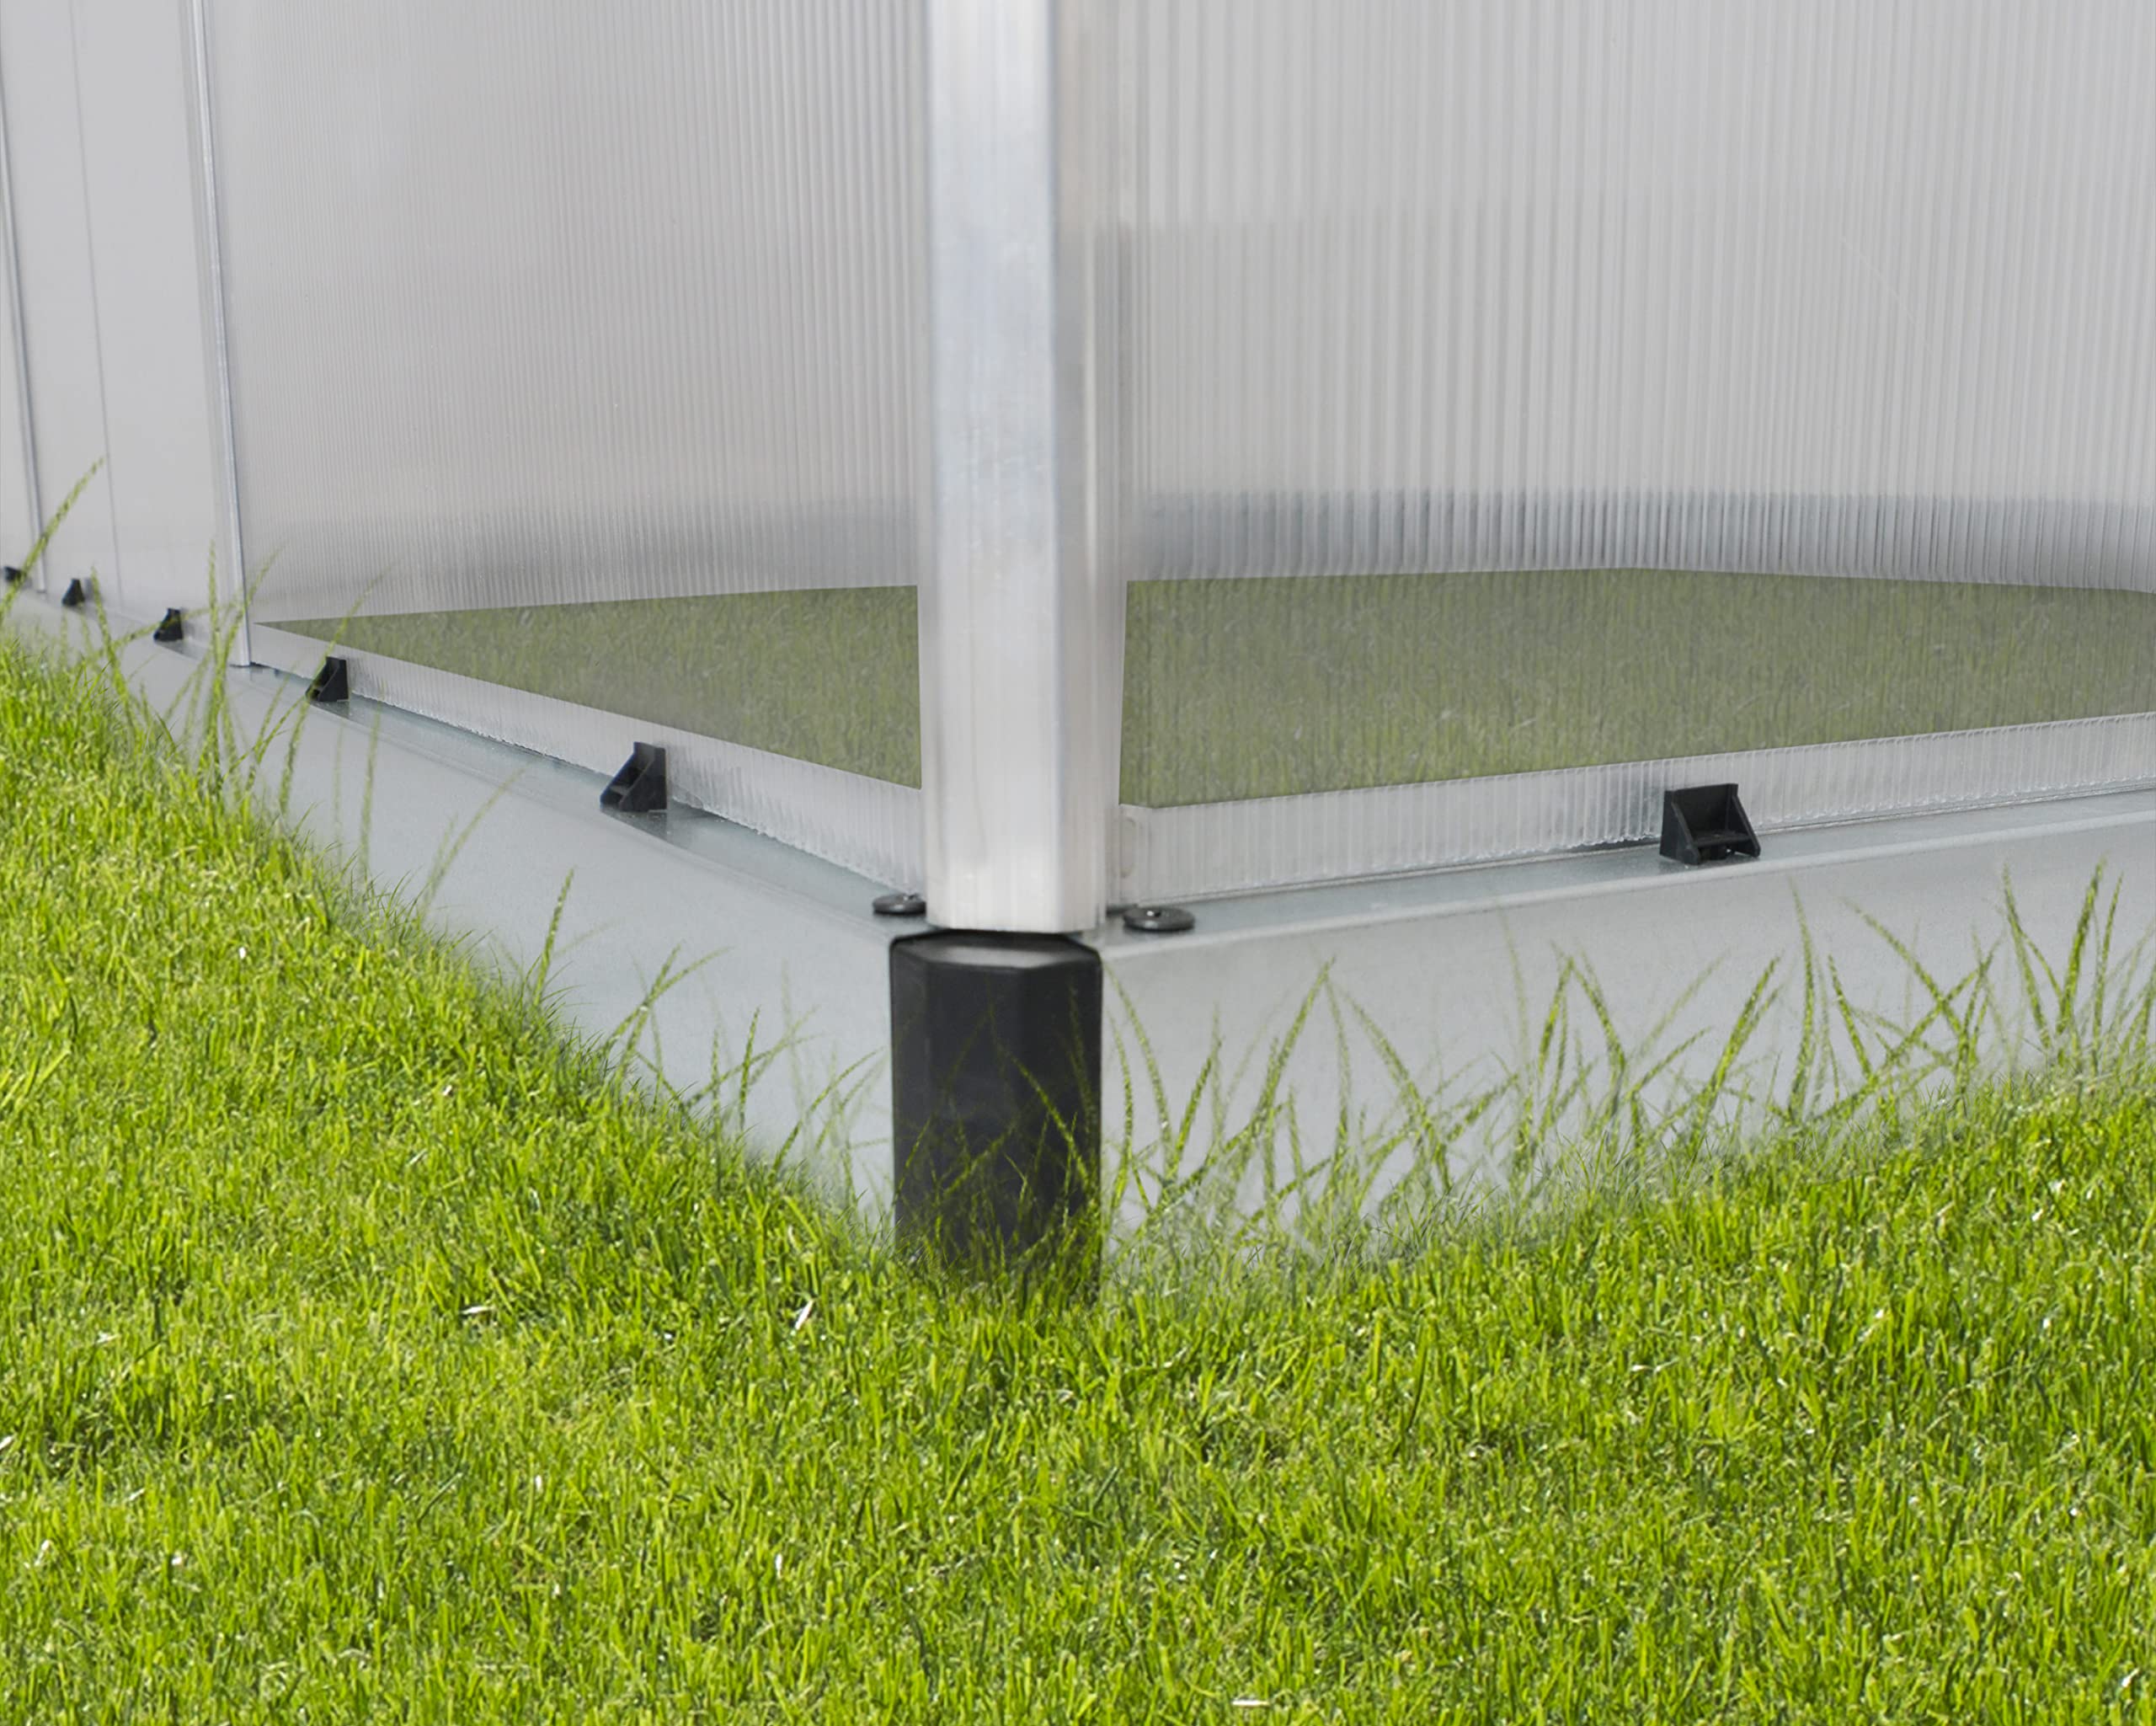
The Canopia 6x8 Greenhouse Kit is a robust and stylish solution for gardening enthusiasts, featuring durable twin-wall polycarbonate panels that ensure optimal light transmission while blocking harmful UV rays. Its heavy-duty aluminum frame and galvanized steel base provide unmatched stability, while the thoughtful design includes a lockable door, adjustable roof vent, and built-in rain gutters for efficient water management. Perfect for DIY installation, this greenhouse is built to last and requires minimal maintenance, making it an ideal choice for year-round gardening.


| Frame Material | Aluminum |
| Cover Material | Polycarbonate (PC) |
| Item Weight | 31 Pounds |
| Nominal Wall Thickness | 0.2362 inches |
| Item Dimensions L x W x H | 97"L x 73"W x 82"H |
| Door Style | French Doors |
| Color | Silver |
| Number Of Vents | 1 |
| Number of Doors | 1 |
J**N
Fantastic little greenhouse!!!
I am so glad that I researched all of the greenhouses. Even though they all look similar...they are NOT. The Palram is the better quality greenhouse. It arrived in two boxes. My husband and I put this together over a two day period. The directions are somewhat hard to understand. Like 56 pages. There are pictures but no writing. Like a lot of items we've had to assemble, this one came in tons of pieces, both large and small, and some of the parts were not numbered. No parts were missing. I recommend that you lay everything out and pre read the directions, then re read them at the time of assembly. There is no flooring included, so you will need to figure something out. We got a load of gravel because I knew it would be high humidity and wet due to all the watering of the plants. We assembled the walls on the first day and the roof on the second day. On the very first night of completion, we had a high wind advisory and when we woke up, it had scooted about a foot across the gravel. We had planned on staking it down combined with strapping steel cable over the top, but had no idea we would need it the first night. Since then, we've added custom built benches, have screwed everything down, and staked it down with steel cables. Nice and sturdy now. We have had several high winds since it has been assembled with no problems. We haven't had any hail yet, but the plastic panels are bouncy, as if the hail could bounce right off and not harm them. There is something I did to keep the windows from rattling and possibly coming loose in a thunderstorm. I duct taped the perimeters of each twin wall panel, both inside and outside. Not only does it act as a caulking(waterproofing it), it is also very quiet now. When it pours the rain, the greenhouse does not leak. I don't know if it would have leaked or not without the tape, I just couldn't stand the rattling sound. I warn you that it will take two, possibly three people to assemble this greenhouse. The whole time we were putting it up, we kept saying how cheaply made it was and how we wanted to quit putting it together and return it for a refund so we could try to build one ourselves using wood, but once it was complete, it turned out to be very strong, and we both agreed that it had to be totally assembled before we could really appreciate it. I've been planting seeds since Feb 25, and am having 100% success rates with seedlings. I do not have a green thumb, and I've never owned a greenhouse before, but I feel like a pro already. This greenhouse will save you money and give you something creative to do... planting seeds and tending to them. It keeps me busy. One thing I have learned is that greenhouses do not stay warm overnight in cold temps. We put ours up in early February and have a little heater in there for the cold nights. Of course, during the days, it has been a learning game for me. Depending on sunshine and outside temps, my greenhouse has been up to 115 and down to 60 during the day. I bought the available shade kit and the available plant hangers. I also bought the Auto Vent Kit for the window, but sent it back because the one that comes with the greenhouse works much better. We built wrap around two tiered wood benches and I plan to use the greenhouse for storage during the winter months. Good luck to you all. I highly recommend this greenhouse. And remember, the smaller the greenhouse, the less your energy bill will be when you need to run a heater. I love my Palram Mythos 6x8 Greenhouse!!!!!Update: Well, we've had this greenhouse exactly one year and it is still as strong as it was the day we assembled it. The duct tape that is on the inside is still intact, however, the weather caused the duct tape on the outside of the panels to fray. I am gladly replacing the duct tape with flex seal spray in clear or another similar caulking. I just love this greenhouse. In the period of one year, we had snow, rain, high winds, many severe thunderstorms with hail with absolutely no damage to the panels. No leaking either. The door has remained strong on its hinges. It is still straight and the latch is still intact. The vent window is still straight and the vent arm is still strong.Update #2: March 2015. Its now going into my 3rd year/season with this greenhouse and it hasn't changed a bit since the day we put it together. We've had some severe snow storms. 10 inches in one downfall a few weeks ago. Last year,during a bad storm with gale winds, the worst that happened was the little window atop blew off. It was simple to put back on, as it fits on a hinge. I added insurance on the greenhouse for a few dollars a month, it is now insured up to 900.00 for any damages excluding wind. I've already had my seeds growing for a month. Still loving this greenhouse. Still recommend it.Update #3: February 2017. Its now going into my 5th year/season with this greenhouse and it is still fully intact. Nothing has changed. The original duct tape I placed around the plastic panels had decayed so I used the new gorilla duct tape that is available. Should last much longer than original duct tape did. Still loving this greenhouse, and still recommend it. My uncle purchased a little greenhouse similar to ours and it already blew apart. He should have bought the Palram!!
R**E
Greenhouse assembly
Purchased April 1st. What was to be a 6hr project by many reviews became a wk in building. Instructions were not clear for assembly, panels were uneven. Door not properly shutting due to a bent top. Panel channels were also closed at some areas because the box was tied tight for shipping that they needed to be opened and some were ruff on edges that prevented the panel to slide also. But all in all nice size for a beginner greenhouse. I recommend checking and inventory before putting together. READ all assembly instructions.
B**B
Actually a Nice Little Greenhouse - Pleasantly Surprised **Added finished pics
Just finished assembling it so of course I can't offer any thoughts on how well it will hold up to heavy weather. Instead, I will focus on assembly.Overall easy to build. To be honest, I would rather build three of these greenhouses rather than one of the doors! Hated the door - fought me all the way and is still not perfect. But it is done and functional (with one "Bob" add on part - a cross brace that I'll mention later).I chose to build on ground contact pressure treated 2x6's and screwed the frame to the lumber. I then used loam inside and around the outside for a little more anchoring. I have ground anchors that I will install later this week. To be honest I more fear panels blowing out than I do the whole thing flying away.Follow the instructions step for step, use a level and a square, and take your time. I did it over maybe 4 days, a couple of hours each day so maybe 8 hours total. I will add that I did it alone. I can see where a second person would be nice but I don't feel that it's really necessary.You will need some brute force here and there - most of the holes lined up well but sometimes a little muscle was needed to get that last 1/16th of an inch. Nothing outrageous, just a little persuasion. The only holes that flat-out never worked were the door hinge holes - absolutely had to run a drill through them to open them up enough for the screws. I suspect the holes are drilled to size before galvanizing and the coating was just thick enough to prevent the screws from going in.The door almost broke me! Assembly was a nightmare for me - this is the one area where a second person would pay off to hold one side while working the other; panels kept sliding out every time I moved a single piece! But I got it and it was done. But then upon installation, the door had a diagonal sag that is really annoying. I bought a 48" piece of 3/4" x 1/16" thick metal and installed it as a cross brace on the top panel. I used the tee-bolts that come with the kit in the frame so no drilling of the door required. But since it was an afterthought, I did have to remove the top cap of the door to insert the tee-bolts into the channel in the frame, The strap worked. (*Pic now included)The other complaint I have is the vent window. I did not get the auto option but I am not sure if that would have mattered. I just don't like the way the window connects/"hinges" to the greenhouse. I think I need to get up higher and have a better look at the intersection of the tow pieces later today because I must be missing something here. No big deal, just something I am not thrilled with.Shelves are due to arrive Monday so I'll add them in. I plan to install flagstone, or something similar, down the center and then maybe use mulch for the floor...we'll see and I will update once I finish it all.Overall - a great value for the money and not that hard to assemble. It is May here now so a little late for greenhouse season but I am sure she'll be using it a lot. I will update periodically.
Trustpilot
Hace 2 meses
Hace 2 semanas