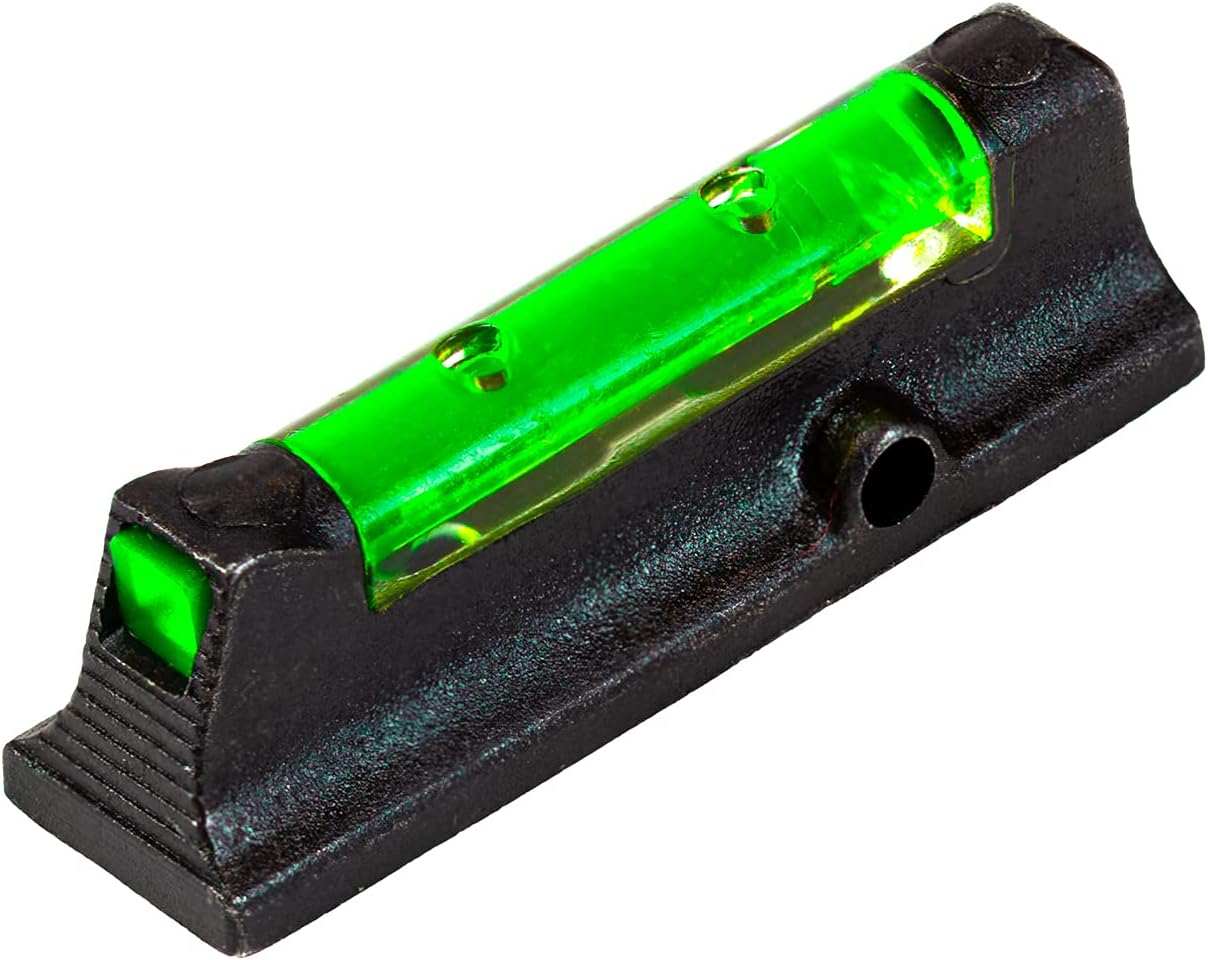
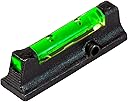


Buy anything from 5,000+ international stores. One checkout price. No surprise fees. Join 2M+ shoppers on Desertcart.
Desertcart purchases this item on your behalf and handles shipping, customs, and support to Panama.
๐ฉ Aim Sharp, Stand Apart โ Elevate Your Ruger LCR Game!
The HIVIZ Ruger LCR Front Sight features a unique square-profile Litepipe for enhanced sight visibility, a pre-drilled steel base for easier installation, and is precision-made in the USA. Designed exclusively for Ruger LCR and LCRx revolvers in .38, .357, and 9mm calibers, this durable sight upgrades your handgunโs aiming capabilities with a clear, bright green dot that stands out in any lighting condition. Installation is recommended to be performed by a gunsmith to ensure a perfect fit due to manufacturing tolerances.
| ASIN | B003K84DO8 |
| Best Sellers Rank | #165,013 in Sports & Outdoors ( See Top 100 in Sports & Outdoors ) #237 in Airsoft Gun Sights #16,542 in Hunting Equipment |
| Brand | HIVIZ |
| Brand Name | HIVIZ |
| Color | Green |
| Compatible Devices | Handgun |
| Customer Reviews | 4.6 out of 5 stars 694 Reviews |
| Global Trade Identification Number | 00613485588095 |
| Included Components | Sight |
| Item Display Dimensions | 6.63 x 4 x 1 inches |
| Item Display Weight | 1 ounces |
| Item Type Name | HIVIZ NPLCR2010-G Ruger Front Sight, Green |
| Lens Color | Green |
| Magnification Minimum | 1 x |
| Manufacturer | HiViz |
| Manufacturer Part Number | LCR2010-G |
| Material | Plastic |
| Material Type | Plastic |
| Model Name | LCR2010-G |
| Model Number | LCR2010-G |
| Mounting Type | Dovetail Mount |
| Night vision | No |
| Product Style | Handgun Sight |
| Reticle Type | Dot |
| Sport | Hunting |
| Sport Type | Hunting |
| Style | Handgun Sight |
| Thread Type | Dovetail |
| UPC | 613485588095 736676120017 |
| Unit Count | 1.00 Count |
| Warranty Description | 1 Year Warranty |
J**R
Okay, so I love having this, but...
5 stars for loving this on my gun. BUT this thing is VERY DIFFICULT to get on your gun. If I was to do it over again, I'd take it to a gun shop and pay them to put it on. Getting the old roll pin out was not difficult. I used a 1/16" punch. You will need to use a lot of padding and put the gun in a vice. Putting in the new roll pin was very tedious and NOT fun. I used the 1/16" punch, a small hobby hammer and a variety of other tools and objects to get the new one in. Even then, the end of the roll pin ended up frayed slightly and a little (not a lot) deformed. Ugh. Just using the 1/16" punch to hammer it in did not work. The punch damages the pin and slips off too easily. To get the last third of it in, I had to use pliers and squeeze it in trying not to hurt the gun. The pin went in but the very edges of it ended up slightly frayed and flush against the new sight. Not bad, no one will notice, it's in 99% of the way and will not budge, but it bothers me. The pin really should be slightly smaller and a better fit. Took me around an hour. Awesome sight though. It works great and I would recommend it. Maybe just hire someone to put it in.
F**Y
An easy install - use the right tools
This sight arrived early this morning and I just installed it. About 10 minutes to get tools out and finish the install. I will say that I am an old guy who has installed more sights than I can ever remember and have a very small but well-equipped shop (I have spent a lot of time and money in the Brownell's catalog and website over many years - great company). These sights are easy - way easier that Smith and Wesson sight changes. There is a ton of good advice in some of the reviews and you will note that there is a great deal of consistency among the reviews that describe an easy install and I won't repeat that info but do suugest that you read those reviews. I will say: Use the correct roll pin punch - that is essential. And having a roll pin starter punch really makes things easier. These punches are not expensive and well worth the money. It seems that moving the pin from right to left when taking the pin out works on most firearms. Reinserting the pin also goes from right to left. Use a bench block or roll of duct tape to support the gun. I use a bench block and a piece of high-density foam packing material cut to the "right" thickness to support the gun while using the bench block. You must support the gun. Use a lightweight hammer and tap lightly. I used a 4oz hammer and if it's really needed go to 6 ounces - no heavier. Take your time, use the right tools and you won't make a "mess" of the finish on your barrel. As for the sight itself. It looks like it will make life easier on my aging eyes and I like. I have HiViz sights on other firearms and have been happy with them. I am really looking forward to giving this a try at the range.
D**N
Nice sight once you get it on.
Really bright nice sight worth the effort to ge on. Old pin came out easily with 1/16 punch as recommended. Old sight came right off new one right on so far so easy. Putting in the pin was a different story I ended up using the old pin and a little was sticking out after a great deal of effort setting it with a punch so I carefully ground it flush with a Dremel tool. Start the pin with the sight off the gun that works but setting it in was impossible. If I had to do it again I would grind the pin down a bit with a file or wheel. The final result looks great but I would never done this on one of my smith and wesson revolvers.
A**S
Great sight !!!
I have two of these sights. They are very nice even in low light conditions. Any darker and you would want a laser sight. The only complaint I have is that there is no hardware with it like the XS Sight. Though if you have a small punch and some super glue, than this is great deal for you. The first one took a good 20-25 min. because it was a pain to line up the pin, but the second one took only minutes. ***** ADVICE--- Use a rubberband to hold the sight on and in place when you are hammering the pin. This will help greatly. I also advise not throwing anything away until it is assembled because those pins have a mind of their own sometimes.
S**S
Taller front sight = lower POI
This sight is advertised as "does not fit the LCR 22 or 22 Mag." That's not technically true. The sight easily installed on my LCR 22 WRM in less than 10 minutes. With a proper 1/16" roll pin punch and some kind of block (a roll of duct tape works), you can install this sight in no time. I think the people complaining about the install don't bother to use a roll pin punch. To the sight itself, the Hi Viz sight measures .244" tall versus the OEM sight at .218" tall. On the 22WRM, that moves the POI down significantly (8-10" at 10 yards) with a normal POA. Your choices are really 1) re-install the OEM sight; 2) find another front sight option; or 3) "AIM HIGH" as they say in the Air Force. If you place the entire green dot "above" the rear sight, i.e. higher than a normal sight alignment would dictate, you can move the POI back up. I think I'll probably look for some other front sight option. I have to give the sight 5 stars because it installs easily, shows up clearly and crisply, and they DID say it wasn't for use with the 22WRM. Can't ding the sight because of my off-label use.
E**G
Excellent quality
Excellent quality, works as it should, easy to install myself and did not change point of aim .
C**.
Works great in low light situations.
Works great in low light, but it is not for no light. Have a trained professional install it or you risk scratching your barrel.
T**Y
Great front sight for my LCR 9mm. Easy to install
Installed and range tested at 7 yards. Acquiring target with the HIVIZ front sight is a piece of cake and my grouping (100 rounds) were all within 1 1/2 inches of the bulls eye. All shots fired were done at semi rapid fire (approximately 1 every second). A lot of the YouTube video's I saw on installing complained that it is a pain to install. With that, I was prepared to take it to a gunsmith if necessary. I'm guessing a lot of them were being done by folks that are completely clueless on how to use very basic hand tools. This installation at the most, took me 10 minutes and I was not in any hurry at all. Here are the tools that I used: - 1/16th Drive Pin Punch - Regular sized 16 oz hammer head with a short handle - Needle nose pliers - Flat surface table top Check out my photo's
Trustpilot
3 weeks ago
2 days ago