Description
🏕️ Upgrade your RV lifestyle with effortless shade and style—because your adventures deserve the best!
- CUSTOM FIT STYLE - Modular design fits RVs from 10' to 20' with 8 stylish color options to match your vibe.
- MANUAL BACKUP INCLUDED - Hand crank option guarantees awning control even without power, so you’re never left exposed.
- QUICK CLEAR INSTALLATION - Complete assembly kit with detailed video guides ensures a smooth setup—get your outdoor oasis ready fast.
- EFFORTLESS MOTORIZED CONTROL - Open or retract your awning with a single button press in under 60 seconds—no more manual hassle.
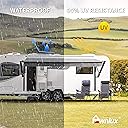
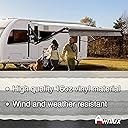
- WEATHER RESISTANT DURABILITY - Premium 16oz vinyl fabric offers waterproof protection and thermal insulation for year-round outdoor comfort.
The Awnlux Black Motorized Modular Retractable RV Awning is a 10x8 ft premium outdoor shade solution featuring a fast motorized open/close system, durable waterproof 16oz vinyl fabric, and modular sizing to fit a wide range of RVs. Designed for easy installation with included parts and video support, it also offers manual operation backup. Available in multiple colors, it combines convenience, durability, and style to elevate your RV or camper experience.