Desert Online General Trading LLC
Dubai, United Arab Emirates
Desert Online General Trading LLC
Dubai, United Arab Emirates


🌟 Elevate your outdoor Wi-Fi game—stay connected, secure, and ahead of the curve!
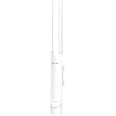
The TP-Link EAP110-Outdoor V3 is a robust, enterprise-grade wireless access point designed for outdoor use, delivering up to 300Mbps Wi-Fi speeds with 2x2 MIMO technology and coverage up to 200 meters. It features secure WPA/WPA2-enterprise authentication, passive PoE with a free injector for easy installation, and cloud-based management via the Omada app, making it ideal for professional environments demanding reliable, scalable, and secure outdoor wireless connectivity.


| Wireless Type | 802.11bgn |
| Brand | TP-Link |
| Series | EAP110-Outdoor |
| Item model number | EAP110-Outdoor V3 |
| Hardware Platform | Windows;Linux |
| Operating System | Microsoft Windows XP, Vista, Windows 7, Windows 8, Windows10 |
| Item Weight | 4.2 ounces |
| Product Dimensions | 3.7 x 8.2 x 1.7 inches |
| Item Dimensions LxWxH | 3.7 x 8.2 x 1.7 inches |
| Color | White |
| Voltage | 48 Volts (DC) |
| Manufacturer | TP-Link |
| ASIN | B07CG3YRTR |
| Is Discontinued By Manufacturer | No |
| Date First Available | March 31, 2017 |
B**L
So simple and easy to setup and it just works!
After struggling for hours with three different solutions (two different Access Points and a Print Server) to join a wired ethernet printer to our wireless network, this one was by far the easiest and quickest to setup on the network. We used the quick setup in the Client Mode and were online in under 5 minutes. This AP was the least expensive of all three previous ones and connected at the 5Ghz frequency. Save your time and sanity and buy this one.
S**E
Easy Setup, Works Great
I set this up as a wifi access point to enlarge my network coverage. Extended the wifi signal at a decent strength of -70 dBm more than 100 ft away from the house, thru the exterior wall with Hardie Board siding. Fast connection for wireless security/wildlife cameras, and my barn wifi extender to connect my car and other stuff. Works well.
D**J
Excellent AP for the price
If your home has ethernet in it (or MOCA), don't bother with mesh wi-fi. Instead, get an access point like this one, and set it up in a dead zone, or a place where your wi-fi signal is weak, AND where you have an ethernet wire that runs back to your primary router/gateway. (Often called "wired backhaul").The instructions are unclear and missing a few steps. I followed them precisely but it wasn't setting up, so I took matters into my own hands. Here's how I did it, if you are trying to set this up in ACCESS POINT MODE (which they claim is the default mode):1. Plug the provided ethernet chord DIRECTLY into a PC that's already on your network (wired or wi-fi, doesn't matter), and plug the other end into the access point.2. Plug in the access point's power, and wait a minute or two for the lights on the front to light up and stay on.3. Go to your computer and log in to your EXISTING router/gateway (NOT the access point), and in there, you should see some sort of "discovery" or "show all devices on network" button somewhere. Every router/gateway is different, so that's about as specific as I can be.4. Once all connected devices are showing, you should see a new device, this access point - you can recognize it by its MAC address (12 characters, without the dashes or colons), listed on the decal on the bottom of the access point. Get the access point's IP address (usually starts with 192.168 or 10.0.0 depending on what type of network protocol you're running) and write it down. While you're in there, you can reserve an IP address for your access point so it never changes again if you want to, but I don't think it's necessary or anything. (I reserve IP address to anything I can log into, like this access point, but that's a personal preference).5. Next, log out of your existing router/gateway, and in Chrome (Edge didn't work for me, but Chrome did), type in the address you wrote above, and hit Enter. It should load a generic splash screen about logging into the access point, showing a field for a username, and a password. On the bottom of the gateway is a decal with the user name (usually "admin") and password to log into it. (I always take a picture of these labels with my phone in case I ever need them again).6. Once you're in, change the password and/or user ID so it's not the default, for security purposes. From here, what I did was I changed the default SSID and password to match my gateway (and the rest of my network), so that when the access point is set up, it matches. This way, your devices can roam about your house and will choose this access point if it's the strongest one, and if you roam back to where your gateway/router is strongest, it will hop off of the access point and join up with that one, all seamlessly in the background. You can still use different SSID and passwords on the access point if you want, but I find the "hop" between access points is faster if they all have the same SSID and password.7. Save everything and log out of the access point, unplug it, take out the ethernet cable, and now to go the ethernet jack where you want your access point set up permanently. Plug the access point into the ethernet jack and plug in the power brick and then test using a smartphone (I like the Android app "Wi-fi Man") that the access point is on and giving a signal. Mine worked on the first try.FYI, this thing also works with a MOCA setup (in case you can't run ethernet in your house, you can instead use existing cable coax as a "network"), but setting that up is its own set of instructions not relevant here.Hope this helps.
R**R
Solid Access Point with One Quirk
This is a great little unit — reliable, easy to set up, and performs well as a WiFi access point. I gave it 4 stars instead of 5 due to one design limitation: although it supports passive PoE, it doesn’t work directly with a standard PoE switch. Instead, it requires its own included adapter, which you have to insert inline with the Ethernet cable and power separately using a dedicated power supply. That means two outlets are needed — one for the switch and one for the adapter — which adds a bit of clutter and complexity to the setup.Aside from that, it’s a solid performer and a good value for the price. Just be aware of the power setup if you're expecting true plug-and-play PoE.
R**F
Stock firmware is unstable on 5GHz, but OpenWRT works great
TL;dr -- this AP is another case of good hardware, awful firmware. The OEM firmware makes this device unusable, but flashing OpenWRT makes it useful again.Full Review:I bought this access point to use as a wireless client bridge for a computer in my house that gets an extremely poor wireless signal. Initially, I was disappointed because I was limited to a 2.4GHz connection, as the 5GHz connection was too unstable to be used. I'd regularly run into issues watching YouTube videos, browsing the web, or making Zoom calls.The solution was to use the 2.4GHz radio instead. This meant that my connection was limited to ~45-60mbps, which pales in comparison to a typical 5GHz connection speed of ~250-300mbps. For reference, my iPhone 11 is able to pull ~560-620mbps when placed next to the hardwired access point.i initially considered returning the AP, but then I found someone online had ported OpenWRT to this access point. Although this may void the warranty, it solved my issue. No longer do I have stability issues with the 5GHz radio, which means that I have both a reliable and fast connection to the Internet again my home office.OpenWRT is great, although it's far more complicated of an interface than the default TP-Link one. I would not recommend using this device in this configuration unless you're familiar with more advanced networking concepts or are willing to learn.Pros:- Inexpensive- Supports wireless client bridge mode.- Supports PoE using the provided injector. This is extremely beneficial to my setup, since I can place the AP where I best receive a signal, even though I don't have a power outlet nearby.- The Qualcomm Atheros QCA9886 802.11acn wireless radio has excellent performance- Gigabit LAN port (to the reviewer claiming it doesn't have one, this is simply not the case; there's no way I'd be able to pull 300mbps if it had a 10/100 interface).- The default firmware supports bridge mode with DHCP & NAT disabled, which means that every device connected through this AP has its real Ethernet MAC address exposed. If you plan to use this on a college campus or want your connected device(s) to be bridged to the parent network, this is very useful. If you use this mode, you can still control the AP's settings using the assign IP address for the access point itself.Cons:- Default firmware means that the 5GHz radio is unstable. I also had problems with controlling the LEDs and updating settings.Bonus Pro-tip:I only used this device with one computer, but you could easily use an Ethernet switch with the single port on the back of this device to connect multiple computers/devices.
Trustpilot
Hace 2 semanas
Hace 2 semanas