🔧 Elevate Your Engine's Game!
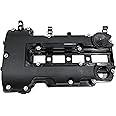
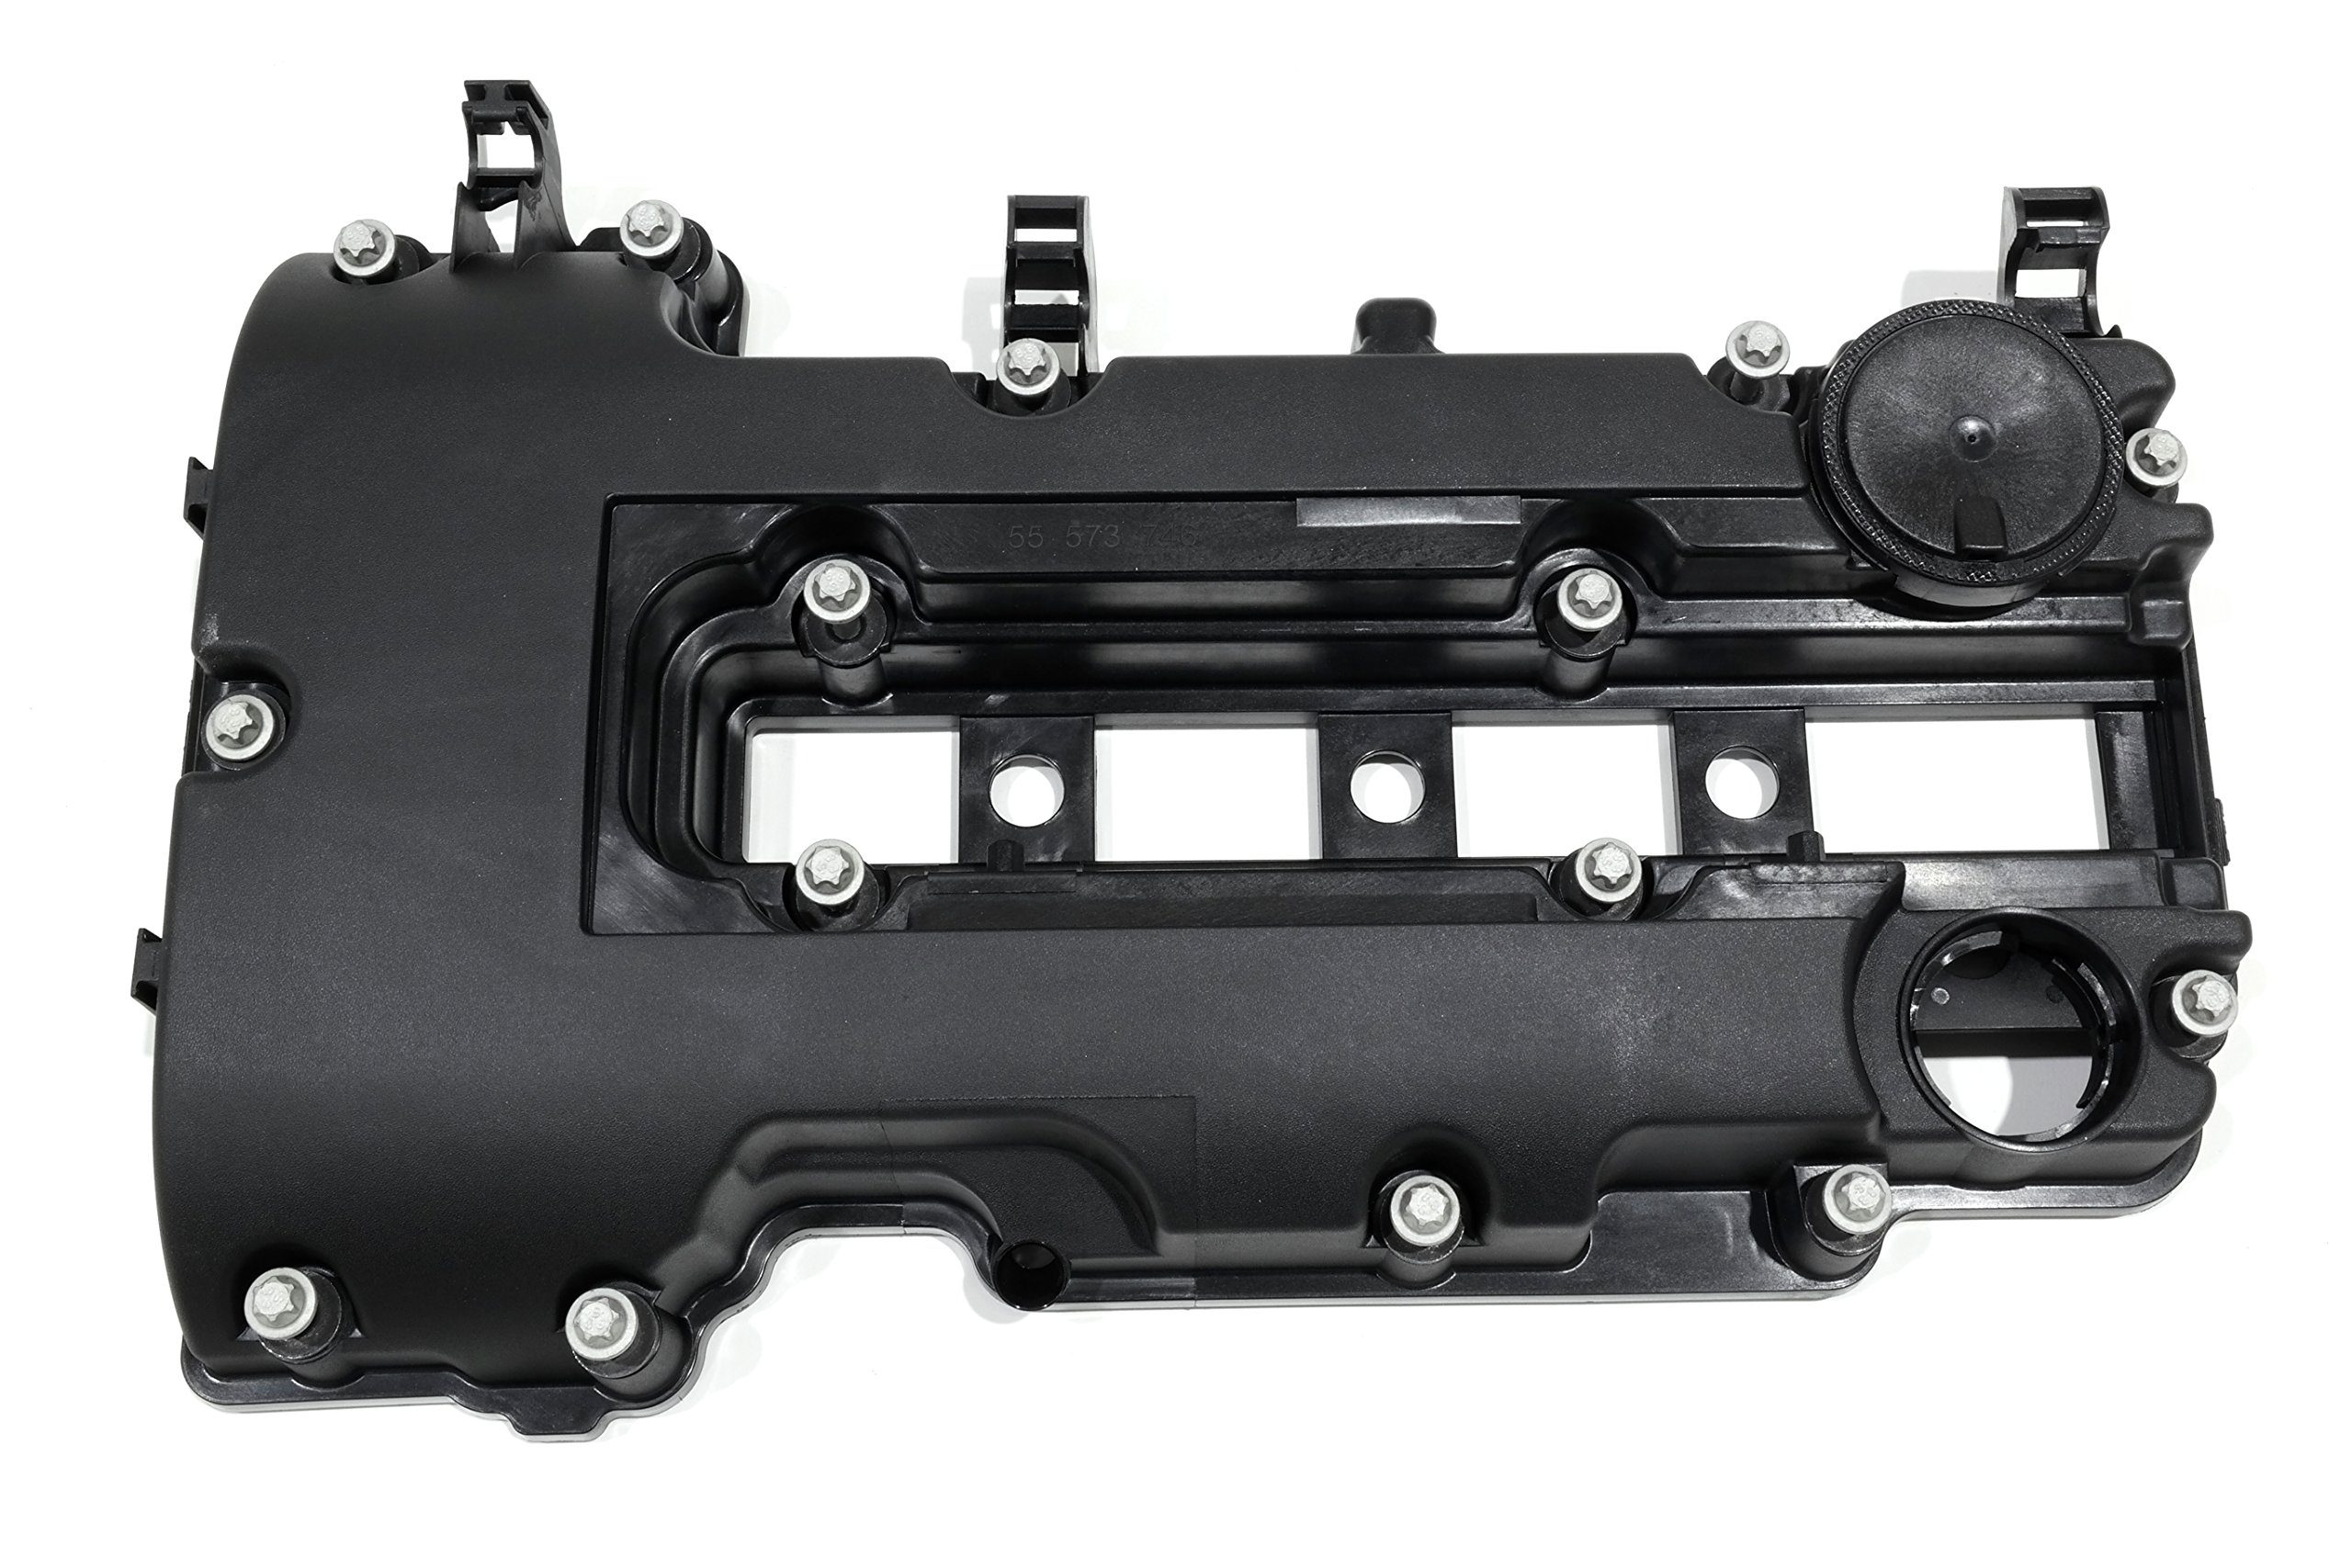
The Genuine General Motors 55573746 Camshaft Cover is a high-quality replacement part designed specifically for your vehicle. Made from durable steel or aluminum, it measures 18 x 5 x 13 inches, ensuring a perfect fit and optimal performance. Upgrade your car with this reliable GM component and experience the difference!
| Manufacturer | GM |
| Brand | General Motors |
| Item Weight | 2 pounds |
| Product Dimensions | 18 x 5 x 13 inches |
| Is Discontinued By Manufacturer | No |
| Manufacturer Part Number | 25198877 |
| OEM Part Number | 55573746 |
M**H
2011 Cruze 1.4 T
Perfect install for my 2011 Cruze. I was experiencing an oil leak from the valve cover. This OEM part worked just as expected. You will need some RTV also for the timing cover seams. Use the recommended torque (71 inch pounds) and sequence to ensure OEM performance.If your valve cover is leaking, look into the issue with the check valve failing in the intake manifold that causes an over pressurization of the crank case, leading to diaphragm and seal failure in this part. You may well also need to replace the intake manifold, or use the cruzekits.com aftermarket kit.
A**Y
Fits perfectly as it should
Excellent factory part for a great part. The sad thing is, if others replaced this part because the pressure regulating valve on top of the cover failed (made a whistling sound along with a rough idle) like mine did, you need to repair the root of the problem or you'll be replacing this cover again. The problem is the failure of the wimpy orange colored, small rubber PCV valve inside of the intake manifold. What you need to do is remove the hard corrugated/ribbed line that connects to the top of the intake manifold and shine a flashlight thru the opening on the intake. You should see the orange PCV valve. You may have to spray a little carb cleaner in there just in case the valve is coated with oil. After that, if you don't see it, that is what cause the pressure regulating valve to fail. Mine was missing and this is the second time I've replaced the cover. You have 2 options. 1) replace the intake manifold and deal with the PCV valve eventually failing again, which it is guaranteed to do due to the poor design or 2) Google "Chevy Cruze 1.4 liter turbo PCV valve repair kit" and purchase and install it, which is pretty simple. It took me about 3.5 hours to complete. With this kit you'll be able to bypass the crappy factory PCV valve design and more than likely never have to replace the cover again. Also you can search the same thing on YouTube and there you'll find the video that will explain this issue much better. How this helps some.
T**.
Worked great for my 2017 Buick Encore Premium
I had the very common check engine light related to an issue with the PCV valve. Unfortunately, GM designed this engine so that you cannot replace the PCV itself but you have to replace the entire valve cover. I went to buy this valve cover assembly locally but the auto parts stores only had aftermarket/non-OEM. I'm normally okay with aftermarket brands, but this OEM valve cover was a decent bit cheaper than the non-OEM versions at my local stores.I installed this in about an hour. I replaced the spark plugs while I was in there as that service was almost due. One thing that I did not realize was that the oil cap extender tube has to be reused (or you have to buy another) from the old valve cover. It's not hard to get off and install on the new one, but it did take a little bit of wiggling (you have to use two screw drivers to lift up the tabs on each side and then it lifts up - once it lifts up you can twist it off).
R**D
Easy to install, works great
Great replacement, easy to install. I did put a dab of rtv high temp gasket maker on the block seam. Lots of great YouTube videos to walk you through this. Invest in an inch/pound torque wrench if you don’t have one. Harbor freight has a cheap option
D**D
Worked as advertised, but some stuff you should know
Was the right part for my 2012 ECO 1.4. I gave it 4 stars just because GM engineering went a bit cheap with this part. I had to replace because of the build in PCV valve went bad and was causing my idle to run rough. It was kicking a P0171 code.The problems I ran into even after watching many install videos: 1. The rubber seal is hard to make certain it does fall out when trying to install it. I used a dental mirror to make sure it was seated correctly all the way around. This is after it was leaking because it didn't seat right the first time. 2. This is an important one and easily overlooked, since the bolt holes are on a horizontal surface there will be oil in the holes. Some of mine were filled half way or more. Oil does not compress, the bolts will not tighten down properly, and the seal will leak. I used canned air to blow the bolt holes out. Once I got the seal down right and the bolt holes clear of oil, it got a good seal and my leaking issues were fixed. I would suggest using a torque wrench to tighten down the manifold since overtightening will cause the bolts or plastic manifold to break, and under torque may cause a leak. Also, there is a specific sequence you want to use to make sure it tightens down correctly.
M**N
No silicone
This was the perfect valve cover replacement for my 2012 Chevy cruze 1.4L ECO model. I didn't use any gasket maker silicone between the gasket and the head and mine did not leak. The old one didn't have any so I didn't want to chance it. I went ahead and changed the spark plugs to another set since it was time and the coils were taken off anyway. The OEM plugs are ACDelco 41121 and 4 of them were only like $20 so why not? Be sure and torque the bolts per the factory sequence to 72 inch pounds (6 ft/lbs) with a 1/4" torque wrench. My HF $12 wrench worked fine.I got the magnetic spark plug socket at Autozone to change the plugs and a 1/2" extension and socket wrench.The car runs smooth and idles perfect now like it was new again. Before it died coming to the stop signs when the engine idled down and vacuum level dropped.
A**L
COMPLETE VALVE COVER INCLUDING THE SEAL
The installation went off without a hitch. Just removed all the old 8MM screws, removed the entire old valve cover & replaced it with this item & screwed in the 8MM bolts that came with it. I liked that the screws were non-removeable 7 the installation was simple & easy. I used the screwdriver ratchet with 8MM socket to attach the valve cover in place. I like other reviewers, didn't receive any instructions/torque specs (I didn't want to break the plastic so I used the screwdriver ratchet & didn't even bother with torqueing the screws down... I may regret it but as of now it works). The old valve cover had a torn seal which permitted oil to leak out & whenever we turned on the heater we could smell all those fumes inside the cabin (may want to think about replacing the cabin air filter as well).
Trustpilot
3 weeks ago
1 day ago