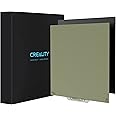
🖨️ Elevate your 3D prints with Creality’s magnetic PEI sheet—print smarter, not harder!
The Creality Official PEI Sheet is a 235x235mm flexible, magnetic build surface designed for Ender 3 and Ender 5 series 3D printers. Featuring a durable spring steel core with a heat-resistant PEI coating that tolerates up to 200°C, it ensures excellent adhesion for PLA, PETG, ABS, and more. Its magnetic base allows easy print removal by flexing, eliminating the need for adhesives or scraping. Quick to install and built for long-term heat cycling, this upgrade transforms your printing experience with reliability and convenience.


| Manufacturer | Creality 3D |
| Part number | PEI-235 |
| Item Weight | 730 g |
| Package Dimensions | 29.2 x 27.1 x 4.6 cm; 730 g |
| Manufacturer reference | PEI-235 |
| Size | 9.25x9.25inch |
| Colour | A-PEI Sheet |
| Material | Plastic, Steel |
| Item Package Quantity | 1 |
| Batteries included? | No |
| Batteries Required? | No |
D**T
More expensive than others but Adhesion Excellent. Issue Leveling Ener3 V2 Solved
I had had problems with my old 3D printer with adhesion but problems solved when I purchased something similar to this. The adhesion was then excellent although I found It needed to keep plate clean and occasionally check the levelling..My Ender 3 V2 was purchased recently as a special offer from Craelity as its end of line (there is now a version 3). I purchased it with the CR Touch levelling device. After fitting this magnetic plate this is how I solved leveling issue as the CR Touch needs help.I had to lower the bottom micro switch - the limit switch for the Z axis. An alternative would be to permanently disconnect but I was reluctant to do that. {It does say to disconnect it in the CR Touch set up instructions but it's not clear if it's supposed to be reconnected}Then I had to fiddle around with the Z offset setting and keep experimenting to actually get the Z offset working so that if you set Z position to zero the print head was actually in the right place. . Then I did a manual leveling in all four corners and only then did I click the level button to do an auto level.Then I did a test print (my test print is a big square made of 4mm lines 100mm x 100mm and only 2mm thick. It adhered well and printed well.My next project is to make a box/dust cover to keep the printer clean and dust free, I will make from Plywood with a perspex door using the dimentions from the commercial covers that one can buy.[I have a separate issue with the USB connection that requireds a 5V Line isolator Search on Amazon for "
I**S
Excellent
Just installed, they look nice. First 5 hours impression, no issue at all. Don't forget to level your bed (if manual print level).
S**A
Absolute game changer!
This is one of the best mods that I have invested in for my Ender 3 V2!I was always skeptical about printing on anything other than glass to the point that even after this sheet had been delivered it took me 2 weeks before I summoned up the courage to try it out. Oh my! I wished I had done it sooner!Not only does the PEI sheet offer amazing bed adhesion it also allows you to remove your print as soon as the print finishes. No waiting for the bed too cool, just bend the sheet and your print pops right off with no need for a scraper whatsoever. Another bonus of being able to remove your print so quickly means if you are running multiple prints you do not have to wait as long for the bed to heat back up as it hasn't had time to cool off.The PEI sheet has a very nice smooth finish so your prints always have a lovely smooth finish to the base of them too.The magnetic sheet of adhesive is really simple to apply and fixes firmly to the existing metal bed plate. When applying the adhesive magnet be sure to start along one edge and wipe from side to side slowly working your way across the bed plate to ensure all air bubbles are avoided/pushed out as you lay the magnetic sheet. Once applied it is as simple as placing the PEI sheet on top and that's it.Being magnetic it makes for easier cleaning with less chance of knocking your bed leveling out of alignment as you just lift the sheet off and place it back on when finished.No need for clips so you even gain some extra bed area too! Not having to contend with clips along the sides of the bed means you can also print closer to the edges than you would with the standard glass bed.This is by far one of the best mods I have made to my printer and I will likely never go back to printing on glass ever again. I highly recommend the PEI sheet upgrade!
S**Y
Saved the V3 SE going in the bin
Literally this gold plate saved the day and left my son beaming. The original was useless and prints went haywire. Read somewhere to buy the gold and I am so glad I did!!
W**E
Replacment for the original ender 3 surface
Got this to replace the original Ender 3 build plate which has seen significant battle damage due to my newbie printing mistakes, (hot nozzle + to high build plate = oops)the surface texture is pretty much the same as the original maybe a little finer in my oppinon.you get 2 magnetic surfaces which is great and going from a clip attached build surface to a magnetic one is night and day! clips are quite annoying to deal with. but magnetic? just pull it of when the print is done, the surface is very flexable so easy to pull even really stubborn prints off the bed, then when you're ready to go again, slap it back down,I will say, watch how you place it back down, I put it down once with too much of an over hang on one side and it kept scraping against the printer, so be somewhat cautious with it.
L**I
Make sure you align the magnet and bed correctly!
Yeah, I thought I didn't need to read the instructions, so like a complete idiot I didn't.It is all really easy, but the stick on magnet sheet has to be properly aligned with the print bed itself, or it simply doesn't adhere to the magnetic sheet.Right, with that bit of stupidity out of the way I found that I had to reduce my print speed on the initial layer by 2/3rds. I also upped the temperature of the bed by 4 degrees. These have helped the initial adhesion with my Sunlu PLA+, something I had teething problems with.But now it works flawlessly. Brilliantly, even.I haven't even got to wait for the bed to cool before being able to remove my prints.A quick wipe with Isopropyl Alcohol between prints helps performance and longevity.Overall, for the price and the performance I'm delighted.
Trustpilot
5 days ago
2 weeks ago