We remain fully operational. Our teams are working around the clock to ensure your deliveries continue safely.

DOWNLOAD THE APP


Customer Services
Copyright © 2025 Desertcart Holdings Limited
DOWNLOAD THE APP
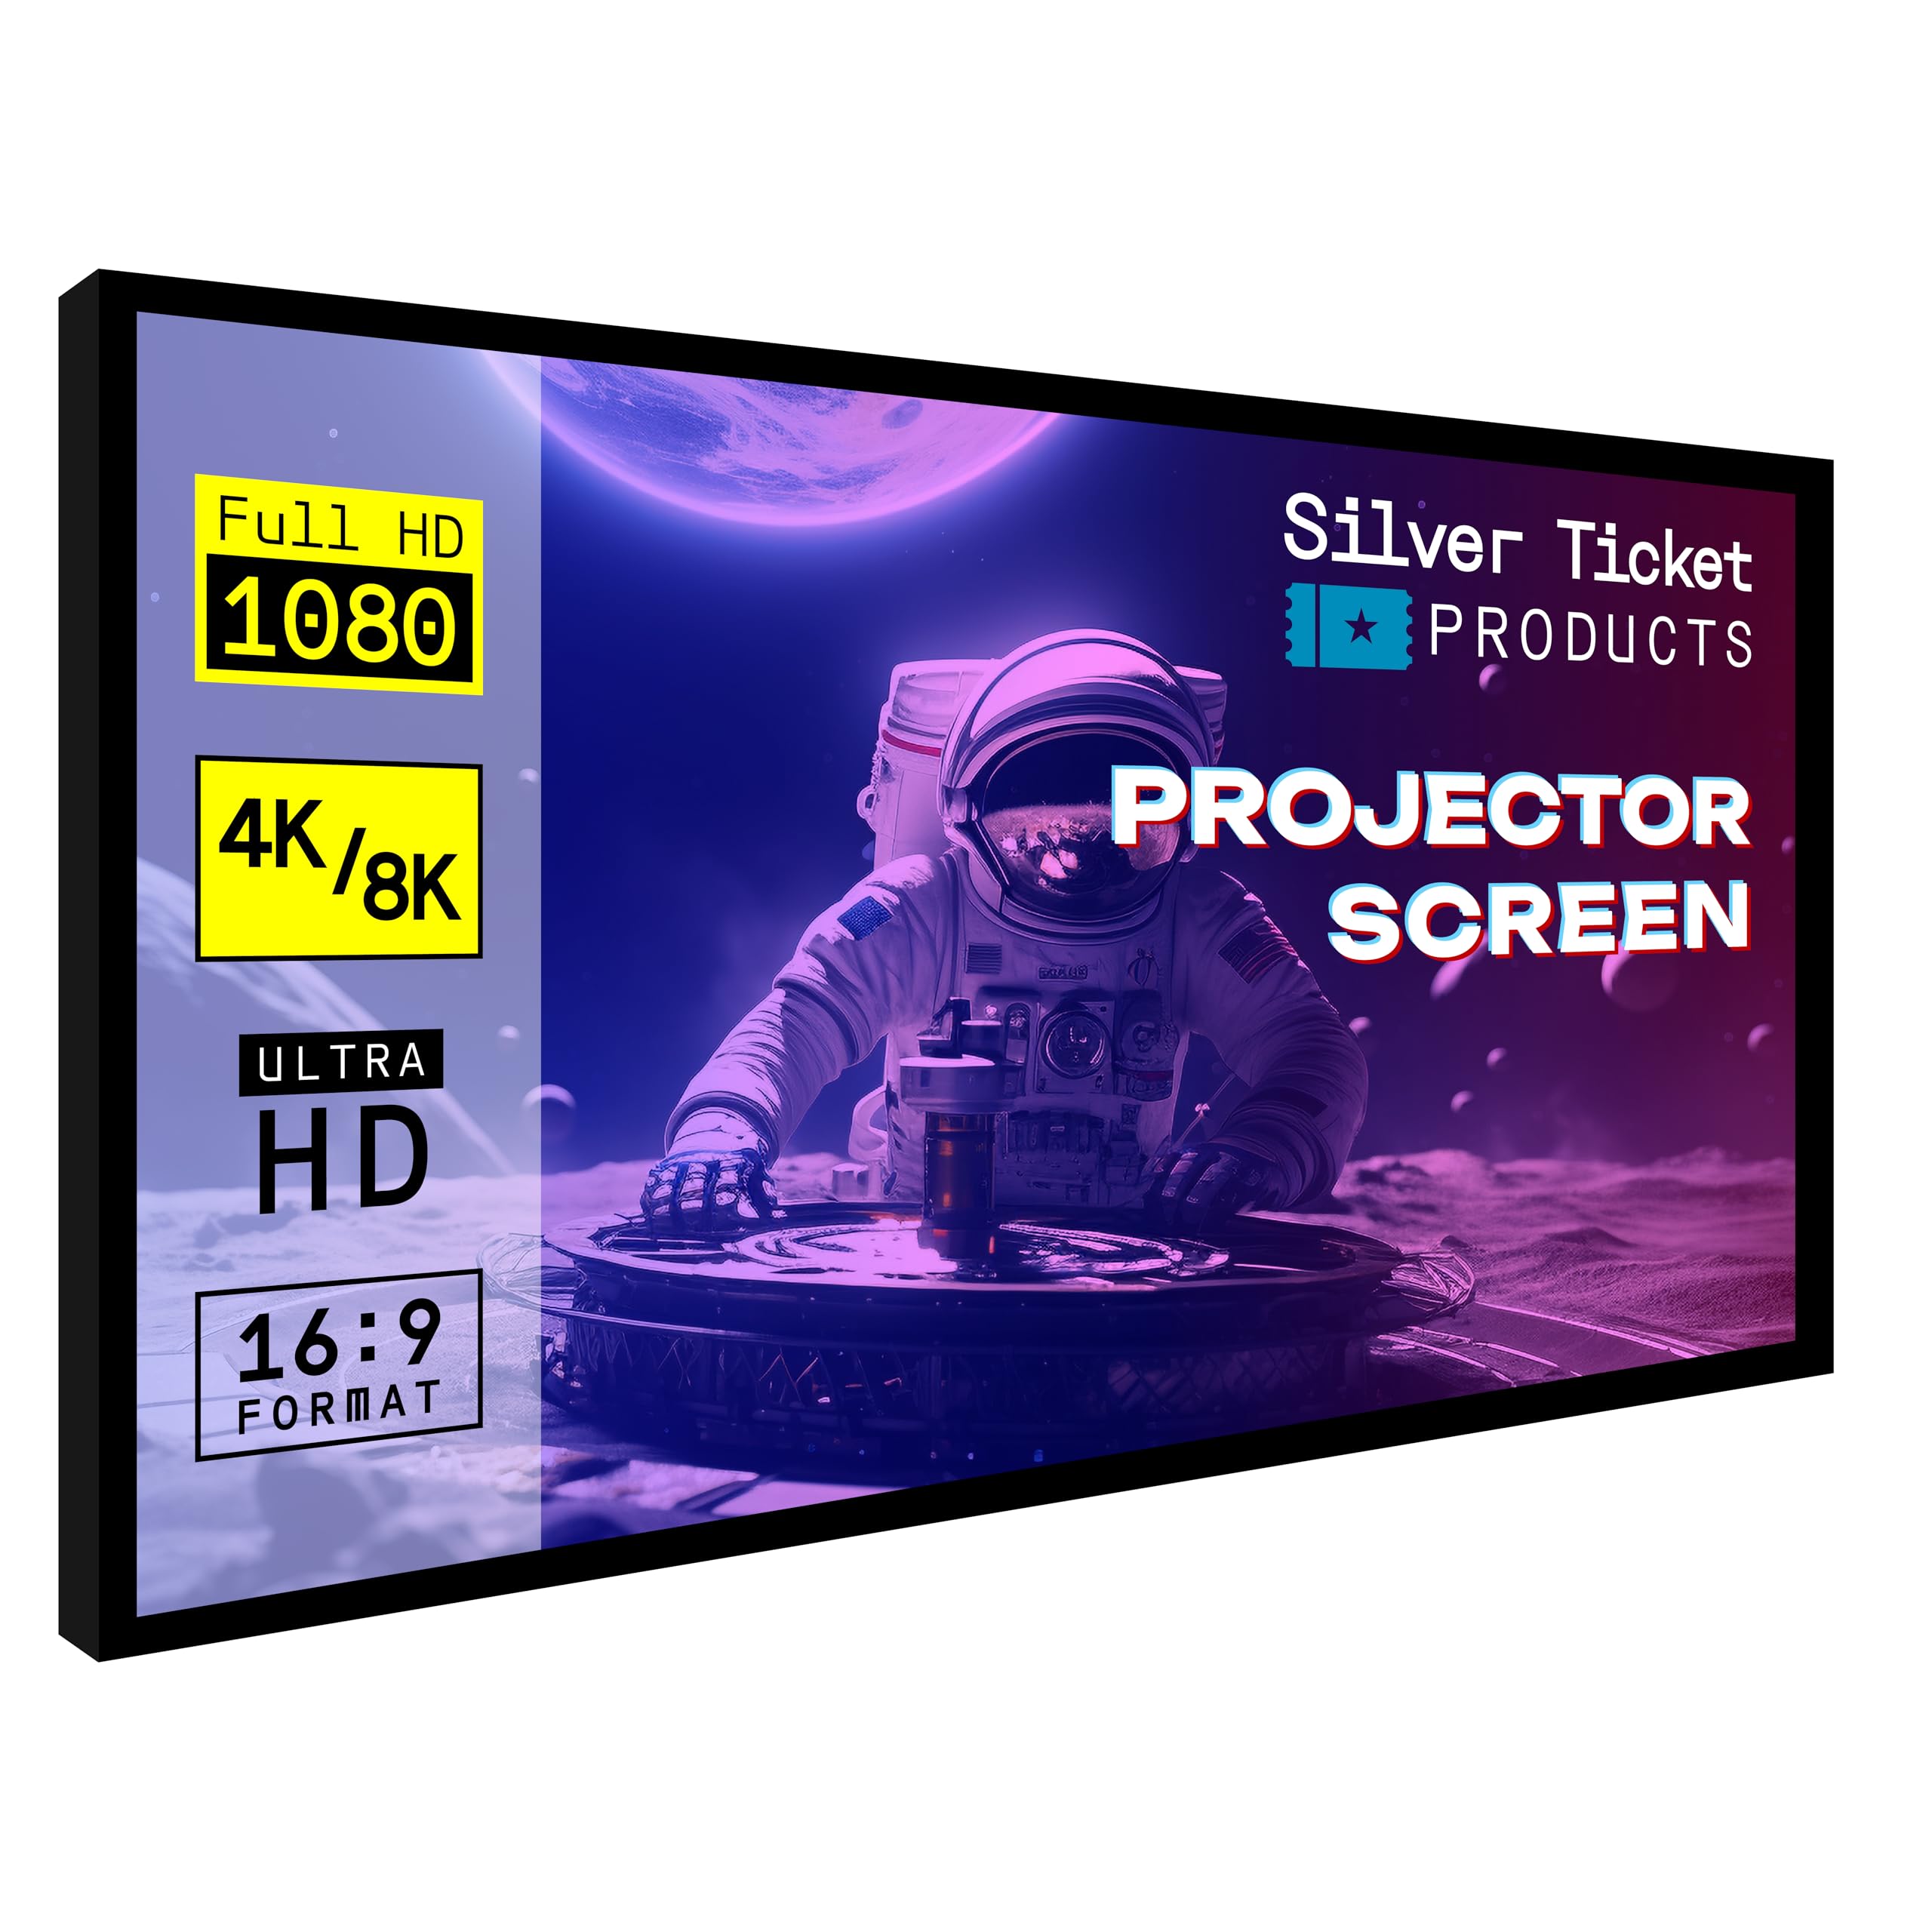
🎬 Elevate your home cinema game with Silver Ticket’s ultra-crisp 120" screen—because your movies deserve the spotlight.
The Silver Ticket STR Series 120" fixed frame projection screen features a high-contrast 0.95 gain dark grey surface optimized for 4K/8K, HDR, and Active 3D content. Its heavy-duty aluminum frame wrapped in black velvet minimizes light reflection, delivering sharp, vibrant images with a wide 160° viewing angle. Designed for native 16:9 resolution projectors and long throw setups, it mounts securely on walls with adjustable brackets and assembles quickly via a tensioning rod system, making it a premium yet accessible upgrade for any home theater enthusiast.


| ASIN | B01N3PXZ3K |
| Best Sellers Rank | #17 in Projection Screens |
| Brand | Silver Ticket Products |
| Customer Reviews | 4.7 out of 5 stars 6,669 Reviews |
| Display Dimensions | 120 inches |
| Enclosure Material | Aluminum |
| Item Dimensions W x H | 109.25"W x 63.63"H |
| Item Weight | 34 Pounds |
| Manufacturer | Silver Ticket Products |
| Material | Aluminum |
| Mounting Type | Wall Mount |
| Operation Mode | Manual |
| Product Dimensions | 109.25"W x 63.63"H |
| Screen Dimensions | 120 inches |
| Screen Finish | 160 Degrees |
| Screen Surface Description | 160 Degrees |
| UPC | 763461680432 |
| Unit Count | 1 Count |
| Viewing Angle | 160 Degrees |
K**.
Outstanding Quality and Value – Perfect 16:9 Upgrade
Excellent quality screen for the price. All materials feel solid and high-quality, from the frame to the screen material itself. Assembly was straightforward and took about an hour, even taking my time to do it right. This screen replaced my old legacy widescreen that wasn’t a true 16:9 format, and the upgrade is immediately noticeable. The image now fits perfectly, looks sharper, and really elevates the home theater experience. For the price point, it’s hard to beat the build quality and overall performance. Highly recommended.
M**Y
A very good screen at an economy price.
I am really impressed with the image quality this screen provides. I have the Epson 5050UB projector in my living room with minimal room treatments. I will have blackout curtains on the windows, but don't plan to paint the walls or ceiling, which are currently white. I was concerned about ending up with a washed out image due to poor light control. I come from an 82" Samsung Q70R with excellent contrast, so black levels are important to me. Right away after assembling and hanging the screen, I was impressed with the contrast and black levels, even with light coming in through the windows. Once it's dark, the image explodes off the screen. The Revenant, followed by Ready Player One, both in 4K, looked amazing. The 5050UB is known for it's great blacks and contrast but this image is everything I had hoped for. I went with the light grey to give the black level a little boost and I am very pleased with the result. As far as colors and the rendering of bright daylight images, this screen and projector combo are a knock out. The sun through the trees in The Revenant made us want sunglasses. The dark scene detail is also amazing. Something even my QLED TV could never do. For those wondering, the screen was actually easy to assemble. Just be sure you have a large open area of floor and vacuum before you start. I was worried about the process, stretching the screen, but it really does go together nicely. The center support bar went in smoothly also. Note to the novices: don't forget to install the hanging brackets before you assemble the frame corners. I did forget and ended up having to make hanging brackets to fit the frame rather than disassemble it to install the hangers. All in all, it turned out excellent. I highly recommend the Silver Ticket light gray screen with the Epson 5050UB.
P**T
Fantastic screen. Exceeded expectations.
I purchased the STR-169120 120" 16:9 white material screen. I reserve the 5-star review for the best of the best, but this purchase meets the criteria -- exactly as described, high quality product, straightforward setup, and good customer support. Before I even received the screen, the Silver Ticket reached out via email and linked the setup video. Even though it was an automated message, they made it clear that I had product support should I need it. Putting the thing together took a bit of time (>1 hour), but it was simple enough with the video instruction. Minimal tools required -- just a Phillips-head screwdriver. The physical instruction manual wasn't the best I've seen, but the video instruction goes step-by-step with great detail so I only glanced at the instruction manual briefly to confirm I had all the parts. All parts and hardware were clearly labeled and in good condition. Came with a few extra screws and plastic screen lugs, so that made me a bit nervous, but the setup was straightforward enough that I realized quickly that I wasn't missing any steps. My biggest concern was whether the screen frame would fit together perfectly enough to make sure everything remained in square and that the screen material would stay wrinkle-free and taut, but the attachment bracers pull the sides in nice and tight. I checked it with my framing square once I was done putting the frame together and it was pretty much perfect. The connections are tight enough where you can't even see the seams where the bars attach to one another. The tension rod system also allows you to stretch the screen over the frame really easily, and the end product was a nice uniform, wrinkle-free appearance. It sits against the wall more flush than my 65" LED TV and only sticks out maybe 3 inches. Looks fantastic and satisfies the perfectionist side of me. Mounting was really simple too. The 4 mounting brackets (2 top, 2 bottom) can be slid into desired position so you can effectively position the screen on the wall however you want without worrying about where your wall studs are. The only thing I would suggest here is sliding one mounting bracket in from each side (one from top left, one from top right, one from bottom left, one from bottom right) rather than sliding them in from the same side like they suggest in the setup video. The reason is because to slide one of the brackets to the opposite side, I had to remove the support bar, then it took some jiggering to get the piece to slide over the center joint. Minimal issue but worth noting. The quality of the picture at 120" far exceeds the picture when I was just projecting onto my white wall or the cheap white projector sheet that I purchased as a placeholder until I could get a real screen. The black frame actually absorbs light spill so even though there is a bit extra due to my angling of my projector and using keystone correction to fit the screen, you can't tell at all. Seriously looks like a professional quality movie screen. Overall, I'm beyond pleased with this purchase. Setup was simple and straightforward, it looks sleek and stylish, and it reflects a beautiful picture. Highly recommend if you are in the market for a fixed-position projector screen. 5/5 across the board.
A**F
Excellent product that was packed adequately and shipped quickly
Excellent product that was packed adequately and shipped quickly. All the parts were included with a few extras of the small items. I'm very impressed with how well engineered this product is. The frame is extruded aluminum wrapped in a nice quality velvet felour that acts as a light absorber so that you don't have to prefectly place your projector. No, this doesn't mean you can move it amy more than a few inches beyond the lens limits, but it gives you needed flexibility for those with ceiling mounts for example. The screen itself is a nice quality stretchy vinyl that also acts to tension itself against the frame, thus removing any wrinkles from being rolled for shipment. Assembly was straightforward. If found the instructions well done and illustrations appropriate for each step. Just be sure to follow each step in order. Take your time and know what you need to do and why. Don't try to be smarter than the instructions to save time. I don't think you can improve on them in any way. Many here have had trouble with the center tensioning/support bar. Just place the bar in the slots on the top and bottom with one side of the bar centered in the joint opposite of where you are working. I then loosene a ffew of the tabs that hold the screen to the edges of the frame. Then I used a rubber mallet to tap the support bar along the groove nearest you while making sure the opposite end of the bar stays in place. Once the bar is in place just pull the screen over the tabs again. Voila. you are done. For me the one thing I did do is after assembly of the frame but before installing the screen. I place the frame only against the wall supported by a couple chairs. Without the screen in the way, it's much easier to see where to place the screws into the wall. I then hung the frame (without the screen installed yet), to make sure it was where I wanted. the slotted design allows the sreen to be moved to the left or right (but not up or down), for final adjustments. I then took the frame down, installed the screen and placed the compleeted screen on the wall over the already installed screws. The final assembled product looks great and my projector an Epson HC3700, came to life. I've never owned a permanent screen before, so I can't speak to other brands, but I'm very much impressed with the ease of assembly and overall quality of this product. One final thing, the whole process took almost 2 hours. That includes a couple of breaks for a soda, and taking my time to ensure no mistakes. Before starting I read through the instructions till I had a firm picture of the process in my head and as I went along I reread the instuctions for the next step. I still missed one step, but I caught it right away and lost no time. I like the way it looks o the wall and I liked it even better with Dances With Wolves playing on screen.
A**R
Great Screen I Couldn’t Be Happier!
I Could not decide on the gray or high contrast screen, so I ordered the material sample kit from the Silver Ticket website. The samples arrived in about 5 days and as soon as they did I set them up on the wall and turned my Epson LS11000 on. I played a bunch of different movies and 4k content, it became very apparent that the gray and high contrast samples looked the best! The high contrast displayed superior blacks and really did not wash the colors out! So I went ahead and ordered the high contrast…. The screen arrived in two days and was super easy to assemble, watching the Silver Ticket assembly video was super helpful especially when it came to stretching the screen material onto the frame. You definitely want to follow the directions on this to ensure your screen is super smooth and wrinkle free! With the help of my wife we mounted the screen and it definitely gave the theater a professional look, it’s super slick looking!!!! The picture my LS11000 now puts out is on par with my 65 inch LG OLED tv, I’m actually kind of shocked how well everything turned out! I must say even with the dark gray screen the picture still looks great with my room lights all the way up! Thanks Silver Ticket I absolutely love my screen!
E**M
I cursed less than 10 times during assembly!
So far so good for a budget-friendly screen. Well, depending on your budget. Quick back story; I bought my first projector last summer (Optoma GT1080... that's next on the list to be upgraded) and started "building" my first home theater from there. I was projecting on a beige wall for a few months, then graduated to $18 white eggshell paint from Menard's, and finally upgraded to a real screen. At least a real entry-level screen. My painted screen was 140" 16:9, and while it was HUGE and cool, it was admittedly too ambitious for the room size (10W x 14L). I decided on 2.35:1 since we are watching more movies now that we were originally. I also play PS4 and XBO, so having a smaller 16:9 area on this Silver Ticket screen is actually much easier on the eyes. I plan to make some masking panels for 16:9 content here one of these days. SCREEN: 4.5/5 Stars The screen itself is pretty great so far! I'm loving the grey as opposed to white. It seems to be reflecting less light around the room than the white paint did, which means my picture isn't being washed out as much. Our walls are a very dark bluish-green in eggshell, so they aren't too reflective. The black levels are much better on the Silver Ticket screen than I got with the paint, and the clarity of the screen is also much better since it doesn't have that texture from being painted on with a roller. :P BUILD QUALITY: 3.5/5 Stars The build quality is...questionable. There were a few screw holes that were clearly drilled in the wrong place and then re-drilled, and re-drilled, and re-drilled until a hole that was supposed to be about 1/4 inch round, was 1/4 inch tall and an inch long. I still managed to get the screws to stay with washers I had on hand. ASSEMBLY: Ouch/5 Stars The instructions were actually fine, which isn't what I was expecting after reading other Silver Ticket screen reviews. And the assembly went swimmingly until I got to the last two steps: stretching the screen, and installing the vertical center bar. I'm fairly strong... Like, a few steps stronger than "I can carry boxes for my grandma" strong. But stretching the screen to fit on the last little plastic things was like trying to stretch a piece of wood. I didn't think it was actually going to happen, but after a solid 10 minutes it finally stretched just enough. It really doesn't look like it's going to stay, but so far it is. And the vertical center bar that goes in last took equally as long and ended in a pretty painful cut on my finger and a sort of smashed fingernail. I literally had to hammer the bar into place, carefully yet forcefully. All that said, the screen looks wonderful when it's up. My picture I posted isn't the best, but I'll post more later when I have time. I think when it's time to upgrade, I'll call the local home theater place and have them assemble and install the next one for me. But for now, this thing does the trick! I'm very happy with it, especially for the price. $280 for a good screen is a fine deal in my book. Just be prepared to curse when you're stretching the screen, and definitely get an assistant to help you. My wife was gone last night when I was putting it together so I had to fly solo.
R**L
Cannot Beat the Value!
Update after three years of use: I uninstalled my screen a few days ago to access some equipment behind the screen and found that the fabric bonding for one of the rod pockets had come "unstuck" over several inches. A photo is included to illustrate. Because this is the first time I could see behind the screen since installation, I can't be sure when this happened. This has not yet come loose far enough to be visible on the exposed projection image side. However, as you can see from the photo, only another inch or so needs to let loose before it can be seen. While it's been a while, I think its fair to expect that was not supposed to happen and was a manufacturing defect. I have reached out to Silver Ticket to see if they can help. I'll update this review when they respond. Here's the original review from 2015: This is my third acoustically transparent screen...the last was a Draper AT1200 106" screen. I wanted to go bigger because my new JVC RS46u can throw a bright enough picture in 3D to make this possible. I've been a home theater fan for many years, and have owned a dedicated theater for well over a decade. Since the days of Laserdiscs, CRT projectors, and Dolby Surround. (You might find me on AVSForum, Emotiva Lounge, or the Polk Audio Forum as "rtart.") As part of my constant upgrade path, I did a lot of reading online before pulling the trigger on the ST screen reviewed here so had no surprises about the assembly instructions (or lack thereof). Watching the YouTube video makes it all clear, and a little mechanical inclination makes it fairly easy to put together and mount. The biggest issue with screens is their shipping size and cost...a ten foot long box is going to cost to ship. ST makes this screen frame in sections, so the longer (top and bottom) frame sections have to be connected somehow. ST manages this issue well, with a very sturdy connector between the two sections. The frame side sections are one piece, so no middle connection is necessary. Corners go together with reinforcing brackets and screws, and are very sturdy. After joining the top and bottom halves, put the corner brackets on the top and bottom first, then connect the frame sides. I recommend adding the hanging brackets at this point, and figure out how you are going to mount the screen to the wall. Trust me, it's easier to do if you can reach through before the fabric is installed. Once you mount the wall bracket halves onto the wall, its time to install the fabric. Pull down the frame and lay it "ugly" side up. Roll out the fabric and thread in the rods in the pockets. The shorter ones go on the top and bottom and meet in the middle. Start in with every third spring to get started, then fill in the ones that are missing. (The diagram does help a little here....the springs should clip down over the rods, and then the other end into the channel on the frame) Fabric is pulled snugly by the springs, but inserting the middle supports (there are 2 here) was easy. I installed the hanging brackets onto the frame first, and set one end against the bracket while "encouraging" the other end to the other bracket with a mallet. If you orient them correctly (see the diagram) they will go in pretty easily...but you WILL need a mallet to get it done. Don't be shy, but you might want to wrap the mallet in a clean cloth to protect the screen surface. A few small wrinkles in the screen, but I expect them to come out in a day or two. If this is an issue, I will revisit this review. Fabric appears to indeed be 1.1 gain, as compared to my other screens and a couple of samples from other manufacturers. Acoustic performance also appears to be as good as past screens I have owned. The weave of the fabric is invisible from my viewing distance, which is around 11 feet. All things considered, this is a substantial screen that appears to have cost a LOT more than I paid. I would recommend it to anyone considering it. Took me about an hour, by myself, from opening the box to watching a movie.
A**R
A Great Value & Very Good Screen.
I purchased the White Material 92" ST Thin Line Screen for my small theater room where I had only 81" between my in wall speakers. This is a very good screen for a great price with a great field of view and color accuracy. You can sit 70 degrees of center and still have a great picture with little drop off in brightness. The ST white material screen has a slight grey tint with a matte finish compared to the sample I had of the Elite Aeon CineWhite. As a result the ST screen enhances the blacks just a little bit over the Elite. All the positive reviews here on Amazon, on the AVS Forum and the Wirecutter review against other screens convinced to try it. . The ST screen enhances the blacks just a little bit over the Elite. In a "dark theater" room, using LOW LAMP mode, the image, screen colors and brightness is very well balanced with the projector's putting 20ftL on the screen. In a low ambient light room, the STANDAND LAMP mode put about 25ftL on the screen and the image not as strong but is still very good with good color saturation. This probably is not the screen material for a moderate or higher ambient light room unless you have a light cannon for a projector. Screen assembly is easy. The positive of this screen is the sleek look of the Thin Line border but that thin border results in tight tolerances to avoid image bleed off the screen. There is no issue installing the center support bracket with this screen as it is installed before stretching the screen. Couple of other assembly hints: A) rollout the screen material to validate how many of the plastic pegs go on each side of the frame; B) the small angle irons go in the same track where you insert the plastic pegs; C) stretch out the screen fully on the floor and take the time to insure the frame is perfectly centered on the loose screen to avoid potential damage by stretching it over the metal frame outer corners. The ST install video shows attaching/stretching the screen to the frame by starting at a corner and working all the way around the screen. I attached the middle on all four sides and worked progressively out to all four corners. My screen did not come with a stretching hook so I used a small straight blade screw driver as a lever to lift the tension rod over the plastic tabs. It worked fine. Screen was perfectly flat. Regarding mounting the screen, the four provided mounting brackets are great quality and firmly secure the screen. They lift the screen frame about an inch out from the wall and as a result the front screen surface is about 3 inches from the wall. To use provided screen mounting hardware you need to attach the Thin Line border frame, as the bottom brackets attach to a lip on it. If you go frameless you can use the top brackets and make two resting blocks for the bottom of the frame to sit on. Otherwise the top of the frame will be an inch off the wall and the bottom flat against the wall. Bottom line - this is a very good screen. You can get a better "reference" level screen but you will spend significantly more for a marginal level if image improvement.
Trustpilot
1 month ago
1 week ago