

✨ Restore, Refresh, Reclaim Your Plastic’s Glory!
The NOVUS PK1-2 kit includes three specialized 2-ounce bottles—#1 Plastic Polish, #2 Fine Scratch Remover, and #3 Heavy Scratch Remover—plus disposable Polish Mates towels. Designed for acrylic and plastic surfaces, it effectively removes scratches, haze, and abrasions, restoring items like collectible toys, protective shields, and device covers to near-new condition. Ideal for professionals and enthusiasts who demand precision and sustainability in plastic care.


| ASIN | B002UD0GIG |
| Best Sellers Rank | #11,638 in Automotive ( See Top 100 in Automotive ) #10 in Polishing & Waxing Kits |
| Brand | Novus |
| Customer Reviews | 4.3 4.3 out of 5 stars (3,984) |
| Date First Available | November 19, 2003 |
| Is Discontinued By Manufacturer | No |
| Item Weight | 6.4 ounces |
| Item model number | 7136 |
| Manufacturer | NOVUS |
| Manufacturer Part Number | 7136 |
| Product Dimensions | 1.57 x 2.76 x 9.84 inches |
C**E
The answer to any collector who wants to restore old toy collectables
I'm going to review this product from an application many have not used in these reviews, but I imagine many have come here hoping they had - restoration of toy plastic. I purchased this product with the intent to restore an old Kenner Batmobile (Batmissile) vehicle. It had a number of quite visible scratches and blemishes on the vehicle including one spot where I had tried to wet sand it leaving a ugly haze of scratches effectively ruining the sheen. So this product had allot cut out for it in terms of making this vehicle look good again. I hate saying this because I sound like a damn info commercial but this stuff is miraculous. Between the number 3 and number 2 applications I completely removed every scratch and blemish on this car. And I do mean EVERY SINGLE SCRATCH including that haze of scratches I left from using a abrasive pad on the surface. It looks better than brand new. But there's something missing in these ads for the product that you need to know if you want to make this stuff work at its utmost best - Elbow grease and multiple applications. These scratches took some effort getting there so it took some effort getting them out. I had to go over the hood portion three times with the #3 solution and then start buffing with #2 before I saw definitive results. If you think you're going to get there like your wiping a window, you're mistaken. And I imagine some of the people disappointed here were led to believe that's all that was needed. Not so. Think about it like you're buffing your car. You have to apply some pressure and do some serious rubbing until it dries then repeat. Use a cloth for each tube. Do not use the same one for multiple bottles. #3 takes down the deep scratches while #2 works on the surface ones. #1 is a cleaning agent to finalize the process and remove any residual application. I even took an old GI Joe windshield from an Adventure Team helicopter that was scratched and weathered and restored it to like new. This stuff works folks, but you HAVE to put some work into them. Now like anything, common sense has to be applied here. If you have a half inch cut in plastic, you're not going to "wipe" that away. But if its something on the surface that even leaves a bit of texture to the touch, this will take it off and leave a beautiful sheen afterwords. It's great stuff and I'm going to start using it on all my old Mego vehicles and essentially anything that fits the bill of being worn out plastic. So if you have old plastic collectible toys that have these problems? THIS is your stuff. It will restore them to like-new condition and I NEVER thought I could say that about any product. Give it a try and remember to put some elbow grease into it. You'll get the results you're looking for.
C**S
I achieved amazing results but you really need a random orbit sander or an electric buffer to get the best finish.
I recently got a really good deal on a Galaxy Note 8.0. tablet. The reason was the lens cover for the camera had major scratches, really deep and the photos came out as if you had a “soft lens” on it. Like for 1980’s glamour photography. Usually you can just replace the plastic lens cover, I have done it before on a galaxy S4 phone. So I bought it and after much searching found no lens covers for sale that would work for the Note 8. Only choice was to buy the entire back case, for too much money. So onto Amazon I went looking for something to polish the lens cover. I have up-loaded a photo showing the before and after, it is a pretty dramatic difference. First off, I read many of the reviews for the NOVUS Plastic Polish and saw many that said they never even used the #3 Heavy Scratch Remover. I think because of the amount of scratches I had, this was the one that really removed the deep scratches and the haze. At first I tried to use the cloth that came with it, and just my finger, I started with #2 thinking #3 would be too harsh, but I soon realized that this way was not going to do it. Or maybe it would have worked but it would take many, many hours of rubbing. I used my Ryobi 5 in. Random Orbit Sander, and a cotton cloth cut to fit on it. I really don’t think you could achieve what I did with out one, the whole process took about 45 minutes. I taped up the back cover with painter tape to protect it while buffing. I had to run it in short sets, like 30 seconds a full speed then stop and make sure the lens cover was not getting too hot. I would add a very small amount of water to the cloth then some more #3. But slowly I could see the outer edges of the scratched area getting smaller and smaller. I kept the process up until almost all of the haze was gone, there was a small spot (size of a pin head) on the outer edge that would not effect the camera’s image. I then changed out the cloth and began the process again with the #2. There were noticeable swirl marks from the #3 but still much clearer than it had been, I would have been happy with that. But after the 3rd stop to add dabs of water and more #2, the small spot that was left over from #3 was gone. I kept it up until it looked like nothing was changing; it was not getting any clearer. I removed the painters tape, and started the clean-up process. Peeling the tape up and using the #1 cleaner on the back of the tablet and ending with the lens cover. The results were way more than what I expected, the lens cover was polished and shiny, the camera’s photos looked great. Even the decorative metal ring that is around the lens cover was shining. So to wrap it up the NOVUS Plastic Polish is capable of amazing results, but you might need to have some other tools to really get the most out of it, namely a random orbit sander or a small buffer. The RYOBI sander I used does 12,500 orbits per minute, if you moved your finger once every second across the area you wanted to polish, it would take a person 3.5 hours to do what this sander does in 1 minute. Or 5 minutes using a sander would be the equivalent of 17.5 hrs by hand.
D**A
Great for minor to medium hairline scratch removal from plastic material.
Very good product when using on plastic turntable dust covers. Takes out about 75% of the scratches. There are still very fine hairline scratches after going through the prescribed scratch removal process. If trying to take out deep nicks / scratches, a more aggressive scratch removing process is needed (i.e. using various grit sand paper vs. this 3 stage liquid kit.). Otherwise, this kit is a fine product for minor to medium hairline scratch removal.
M**E
This worked well on my Dual 1970's turntable dust cover! The "protectant" is questionable though
I have a Dual turntable from the early 1970's with a clear dust cover. The turntable had a good life and was in storage for 20+ years. The dust cover had a slight imprint on the top from a stack of papers sitting on it. Plus the plastic had the usual scratches from years of use. I used these Novus polishes on the dust cover with GREAT results. The scratched top looks as clean and clear as the sides which don't have much wear. I would easily use this again. One caution is that the "#2 Fine Scratch Remover" is very runny and does not stay in place, so you have to be careful not to let it run off. My only concern with this 3 product collection is the "#1 Clean Shine Protect" product doesn't seem to do much. It is a thin semi-transparent liquid and after applying it, I can't tell it did anything other than make my fingers smell like chemicals. Maybe there is some good use case for this product, but it wasn't on my turntable dust cover. Finally, be aware that these products do not ship in retail packaging; they are in a plastic bag with some disposable polishing cloths inside. You don't get a fancy box, but that's OK for me.
N**I
This **** Works; For Me Anyway
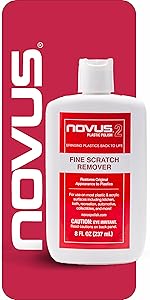
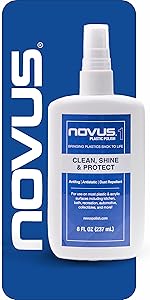
Excuse the spontaneous title, as I mean to elaborate on what I said in it. Okay. I have a DSi XL (Mario) and a DS Lite to test this stuff on. I find that the #2 (fine scratch remover) is MOST effective. I had one fine (light) scratch on my DSi XL that's been bugging me. Yes, I am one of those people who are a little OC when it comes to keeping your stuff in pristine shape. I tested out the #3 (heavy scratch remover) on my heavily scratched DS Lite (got it used from Gamestop), and I can't really tell the accuracy of that one. The thing is, DO NOT AGGRESSIVELY BUFF your plastics like the instructions imply. You will only add MORE scratches to the plastic. My DS Lite was the test system for this experiment, and I learned that first hand. After seeing that not only did #3 NOT remove those heavy scratches (if they are too heavy, it will not work period), but by buffing the Lite's screen aggressively, I added MORE scratches. I wouldn't trust #3 as much as #2; then again, heavy scratches are more severe than fine/light ones. As for the fine/light scratches, you are in luck basically. Those types of scratches aren't as serious; and by GENTLY buffing the area that's lightly scratched, you WILL get results like I did with my DSi XL. The scratch is gone, as if it were never there. I am pleased now; and just like me, you can rest assured that if you apply #2 PROPERLY, you WILL get the same results. As for #1, I consider it a bonus. You really don't need to apply it like the instructions claim. The instructions, by the way, require you to use removers #3, #2, then apply #1, the cleaning solution, afterwards. I say follow this order ONLY IF the problem is serious, and buff gently the whole time. Other than that, as I said before about #1, it isn't necessary. Just GENTLY wipe the area you are repairing after applying the scratch remover(s). This review is mostly for those who have inquiries on using this stuff on their hand held video game systems' screens. Just like me, I am sure plenty of people are wondering if this stuff, let alone a host of other solutions, are available to remedy a scratched screen problem for a hand held video game system's screen. For fine scratches at least, this is definitely a solution to that problem.
A**N
Excellent!! Saved me $800!!
So here is a little background before i start raving about how wonderful this product is... I recently purchased a used car and it has a small display right above the dash which displays the time, radio station and other irrelevant things. This display has a plexiglass cover over it. The previous owner had sprayed it with some chemicals which caused spots to appear on it. These spots annoyed me every time i looked at the display. So i decided to do something about it and purchased a spot cleaner from Amazon. This spot cleaner of course came with a nice booklet about dos and dont's which i chose to not read. BIG mistake. I was not supposed to use it on plastics and mine being a plexiglass, it didnt quiet go well. After rubbing(sanding) it on the display for a good 5 minutes, the spots were gone alright, but so was the plexiglass surface. I had totally messed up the display. It had so many minute scratches, it looked almost "frosted". It was worse than before. I could barely see through the glass now. I did ask my dealer about fixing this and he said i will have to replace the whole front assembly of the display which costs $800. So i started looking around for a good scratch remover to try my luck at fixing it myself. I decided to give this a try after reading all the good reviews it had. It came with the three bottles labelled 1,2,3 as pictured. I started with the number 1 bottle first to clean the surface of the plexiglass. Then proceeded to use the number 2 bottle. Applied the thick paste on to it and started working it. I did this for probably a minute. There was a white residue on the surface after it dried. I again poured some from the number 1 bottle and wiped the residue off. To my surprise i could see a huge difference already. The "frosty" look was almost gone! I could see through the glass again clearly. There were a few scratches still visible so i went to work on it again repeating the same steps. This time it was even better!! All it took was two applications of the number 2 bottle and i didnt even have to use the number 3. The surface is not completely scratch free but you can hardly notice them. I will probably have to use it again to completely remove the scratches but i am happy for now. So there you go, if you wanna polish out some scratches and bring back the luster to the surface of your plastics, definitely give this a try first before looking into more expensive options. Hopefully it will save you a lot of $$ just like it did for me. Cheers!!
G**R
easy instructions and works well to disappear scratches.
I was quite happy with this product. I had some slight surface scratches on my shiny black suv, and this handled the problem quite nicely fr4om light too medium scratches... followed the instructions tons and the scratches disappeared.
L**.
Does not work on plastic monitor screens
Unfortunately, this product is a waste of money, at least in my application, which was scratch repair in a Dell 19" computer monitor with plastic screen. - There are two scratches, and both look fairly small to me. I initially attempted using only the "fine scratch remover" (after cleaning the site), and this did nothing. - I then attempted to use the "heavy scratch remover" by following the directions on the bottle, following it with the fine scratch remover and then the plastic shine. Again, nothing. - Last, I watched videos where folks applied the heavy scratch remover in circles (rather than perpendicular to the crack, as the instructions say) and then followed up with fine remover and polish. I did this, and, again, no difference. Cracks remain, but my monitor screen looks like I spilled coffee on half of it (see image).
Trustpilot
3 weeks ago
2 weeks ago