
Desert Online General Trading LLC
Dubai, United Arab Emirates
Desert Online General Trading LLC
Dubai, United Arab Emirates


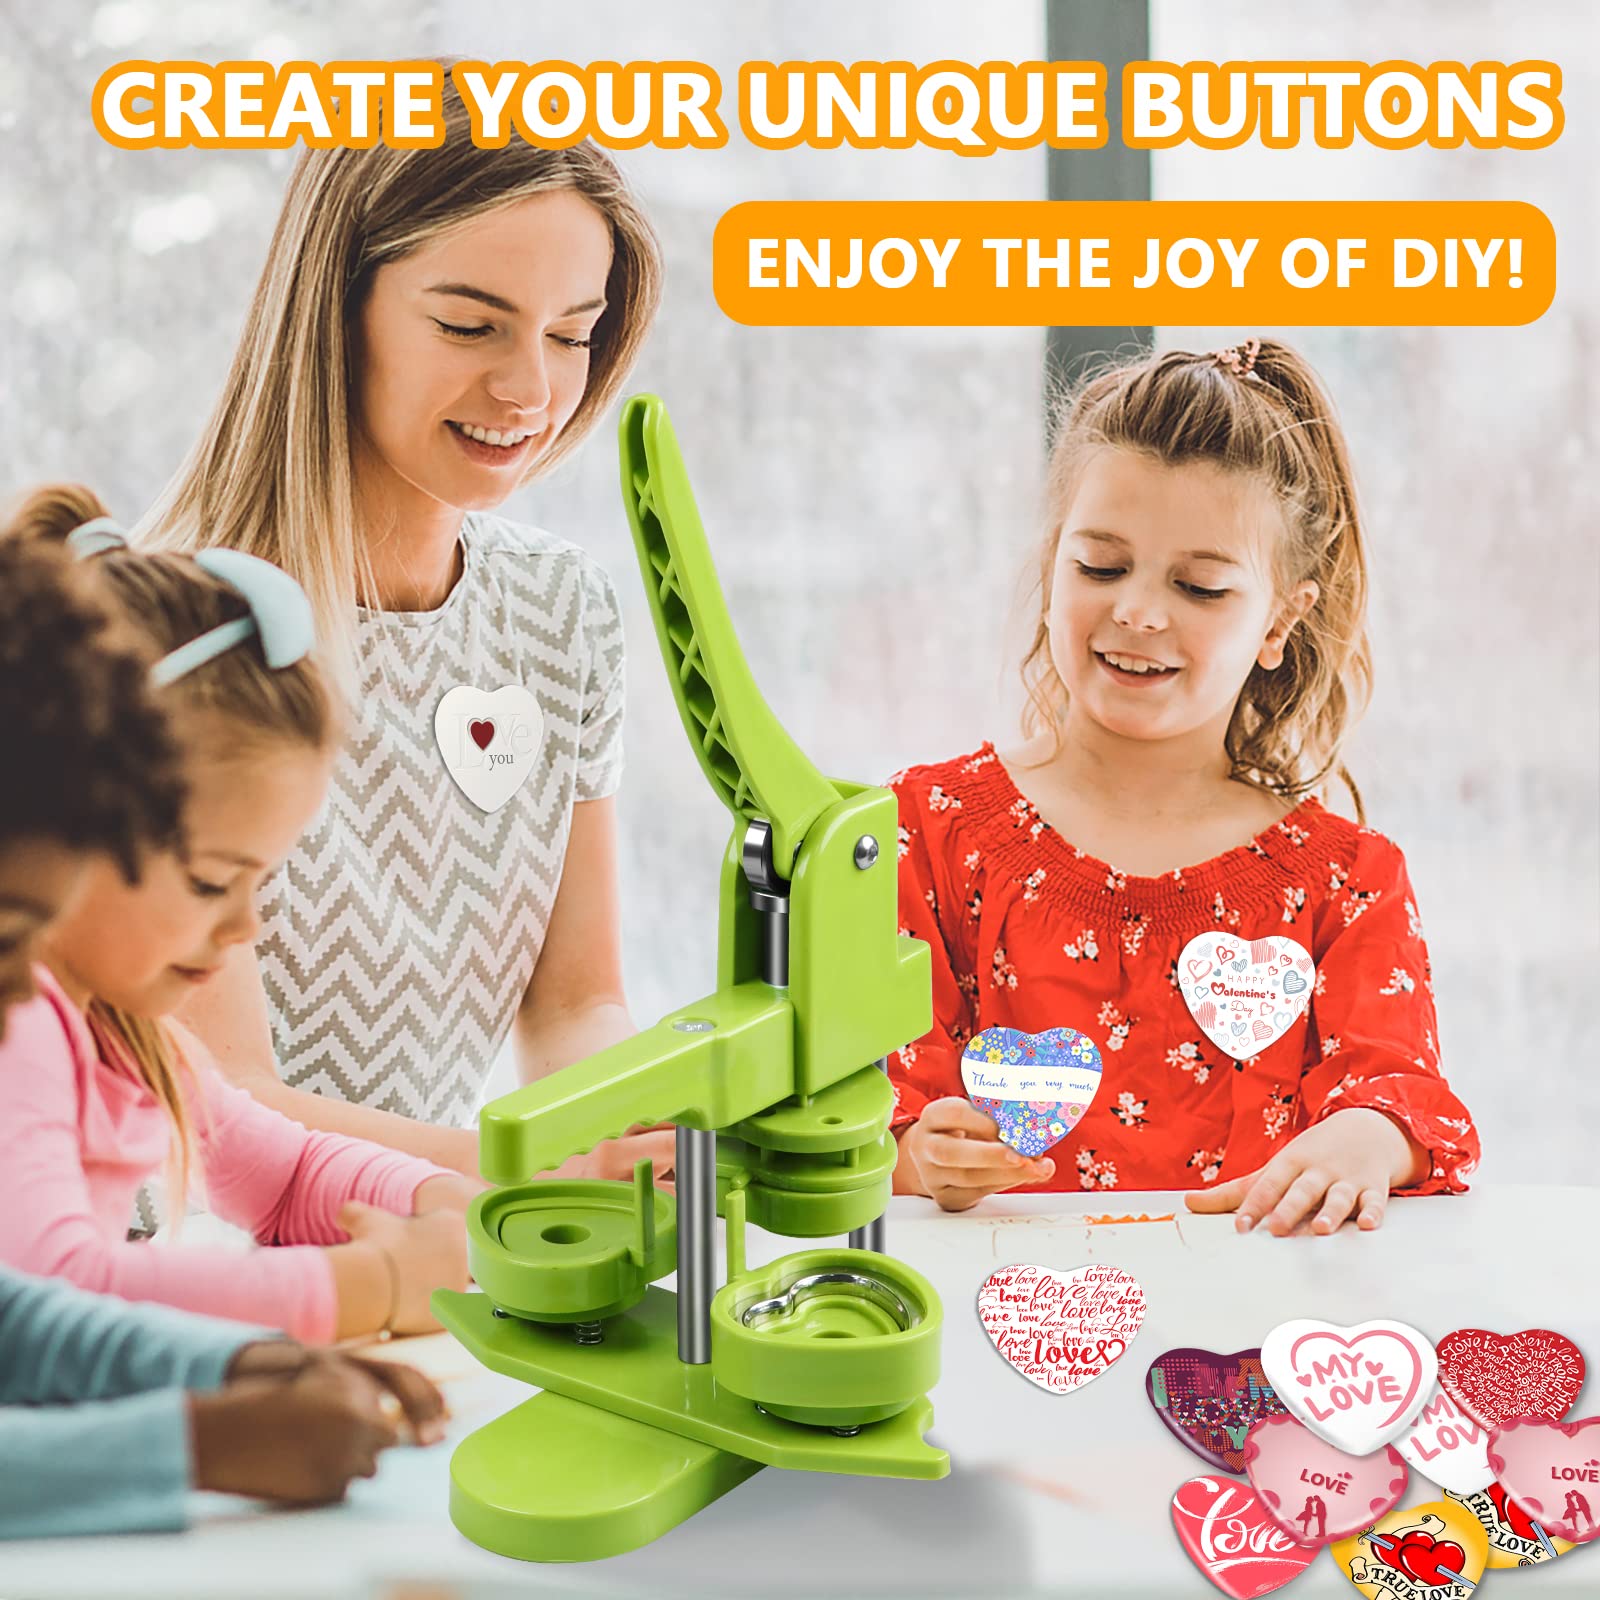

🎉 Create, Customize, Celebrate! Your button-making adventure awaits!
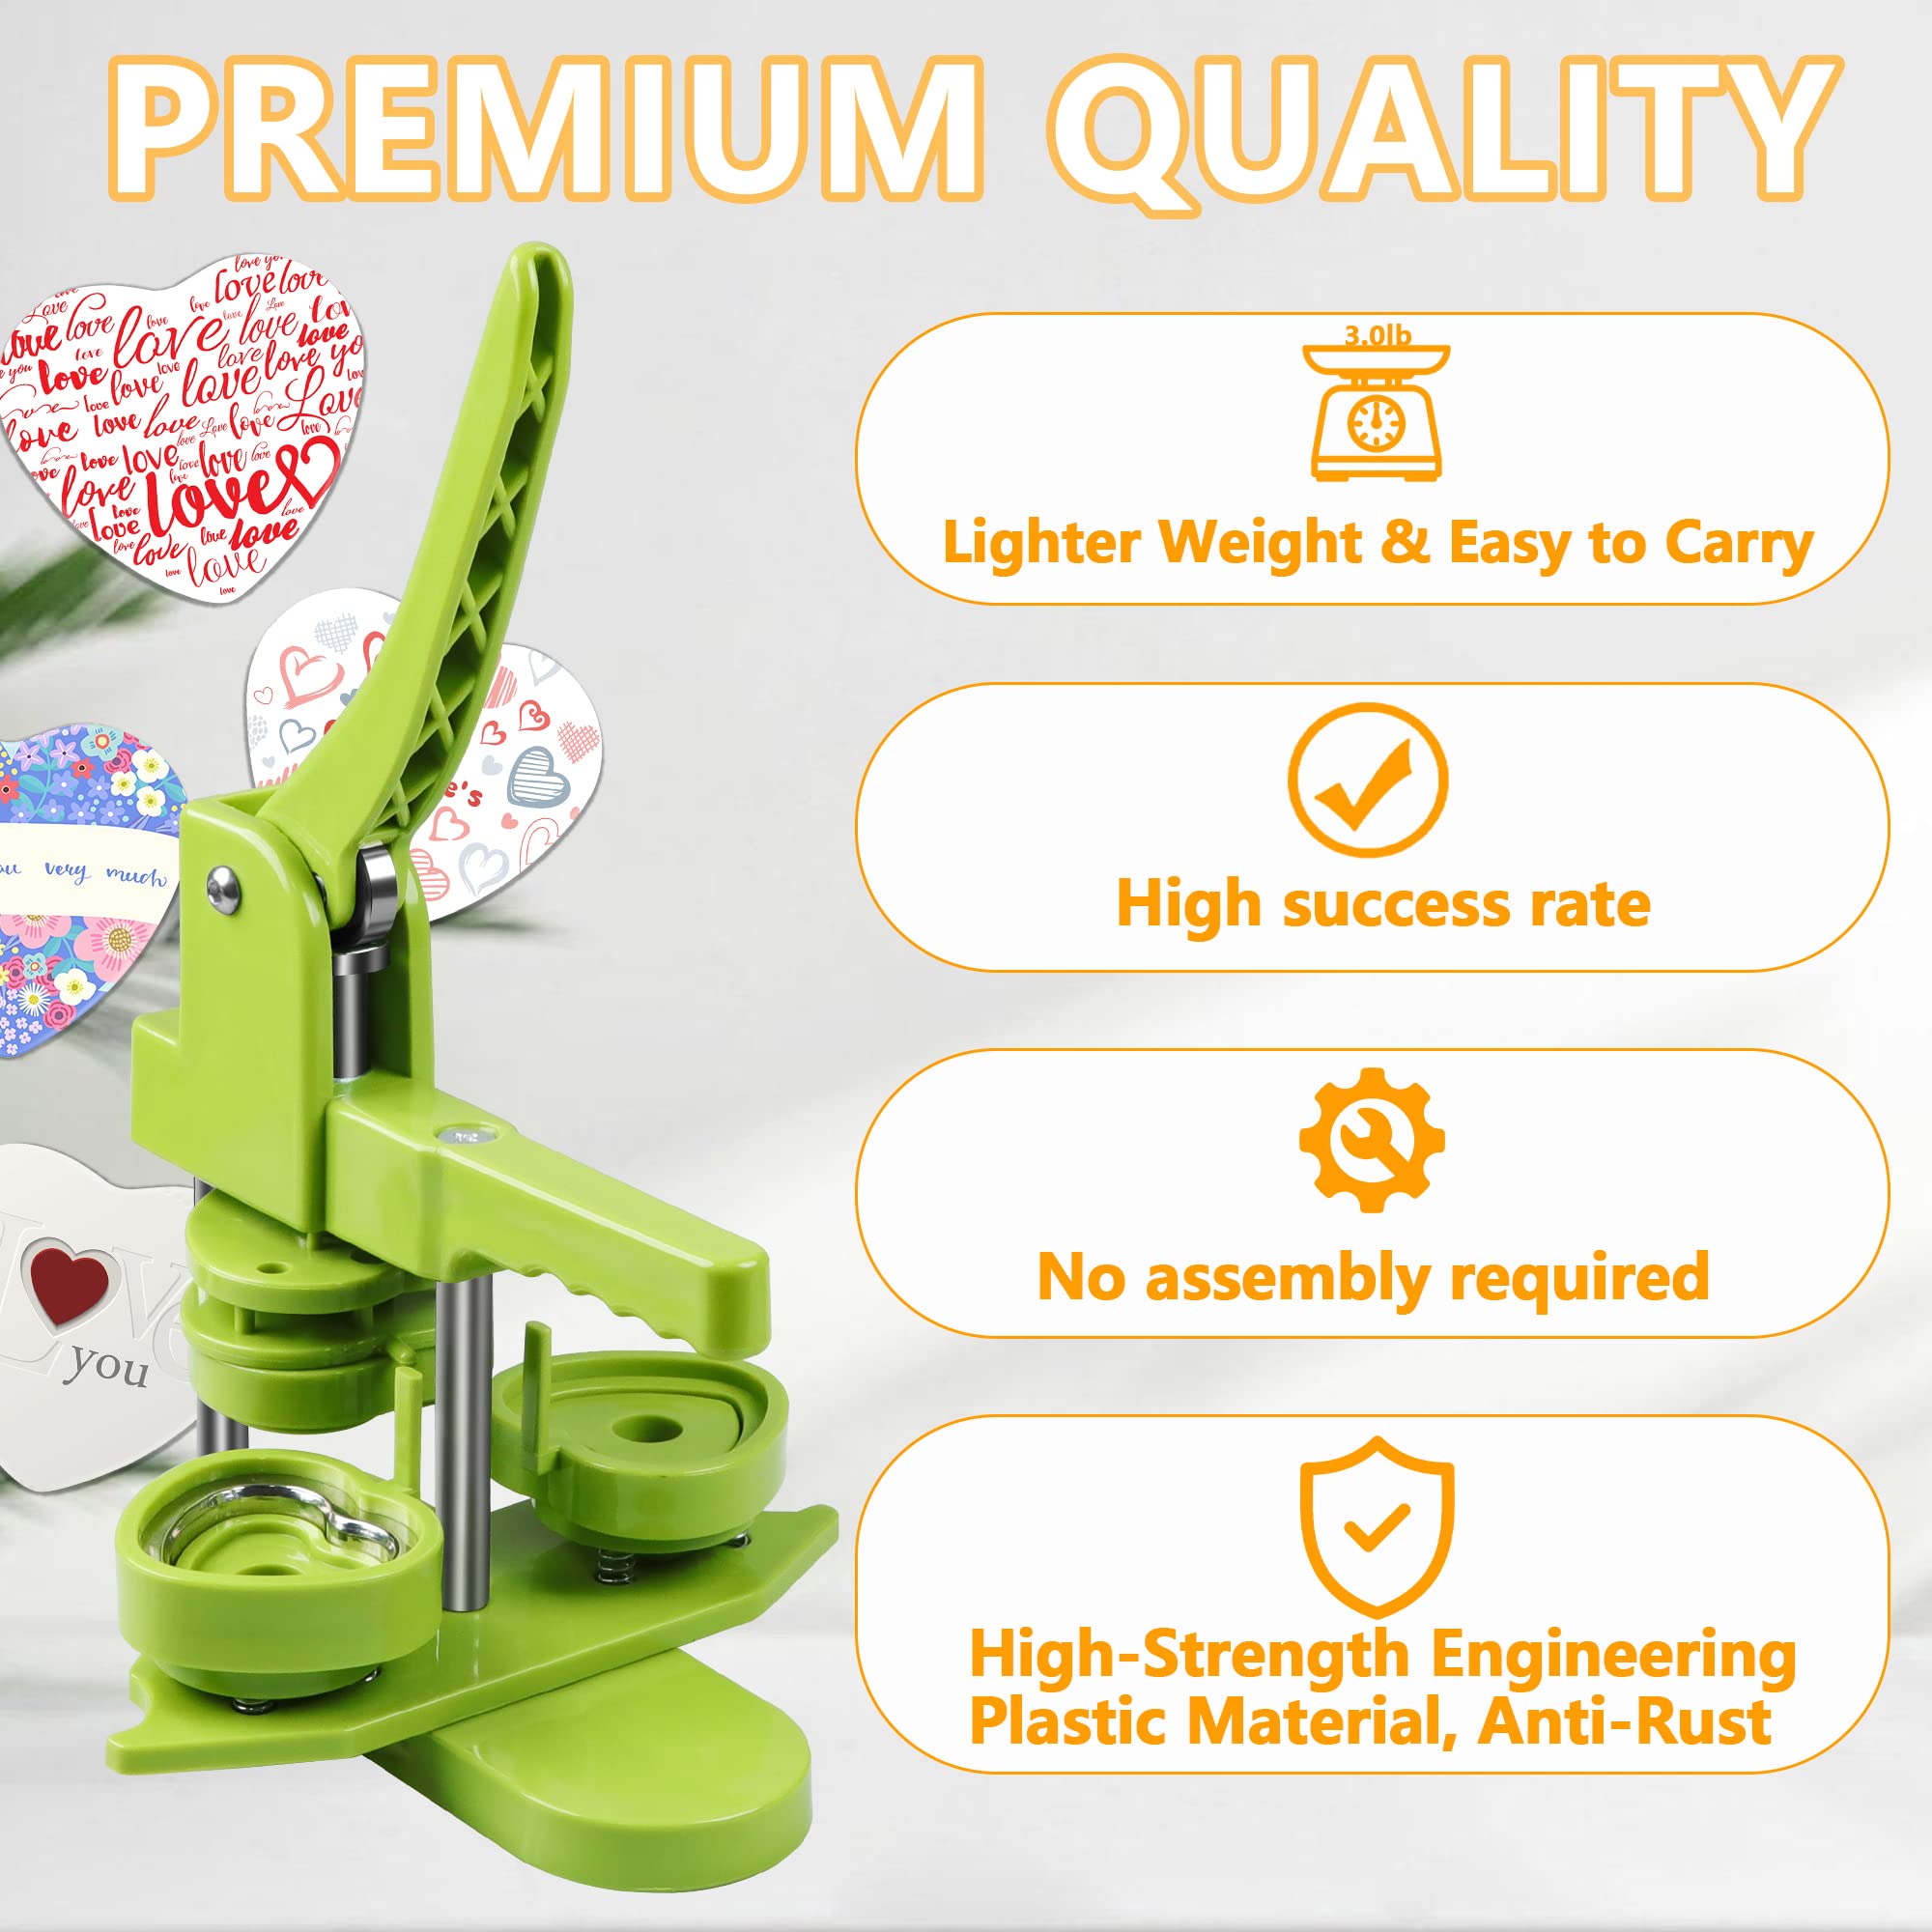
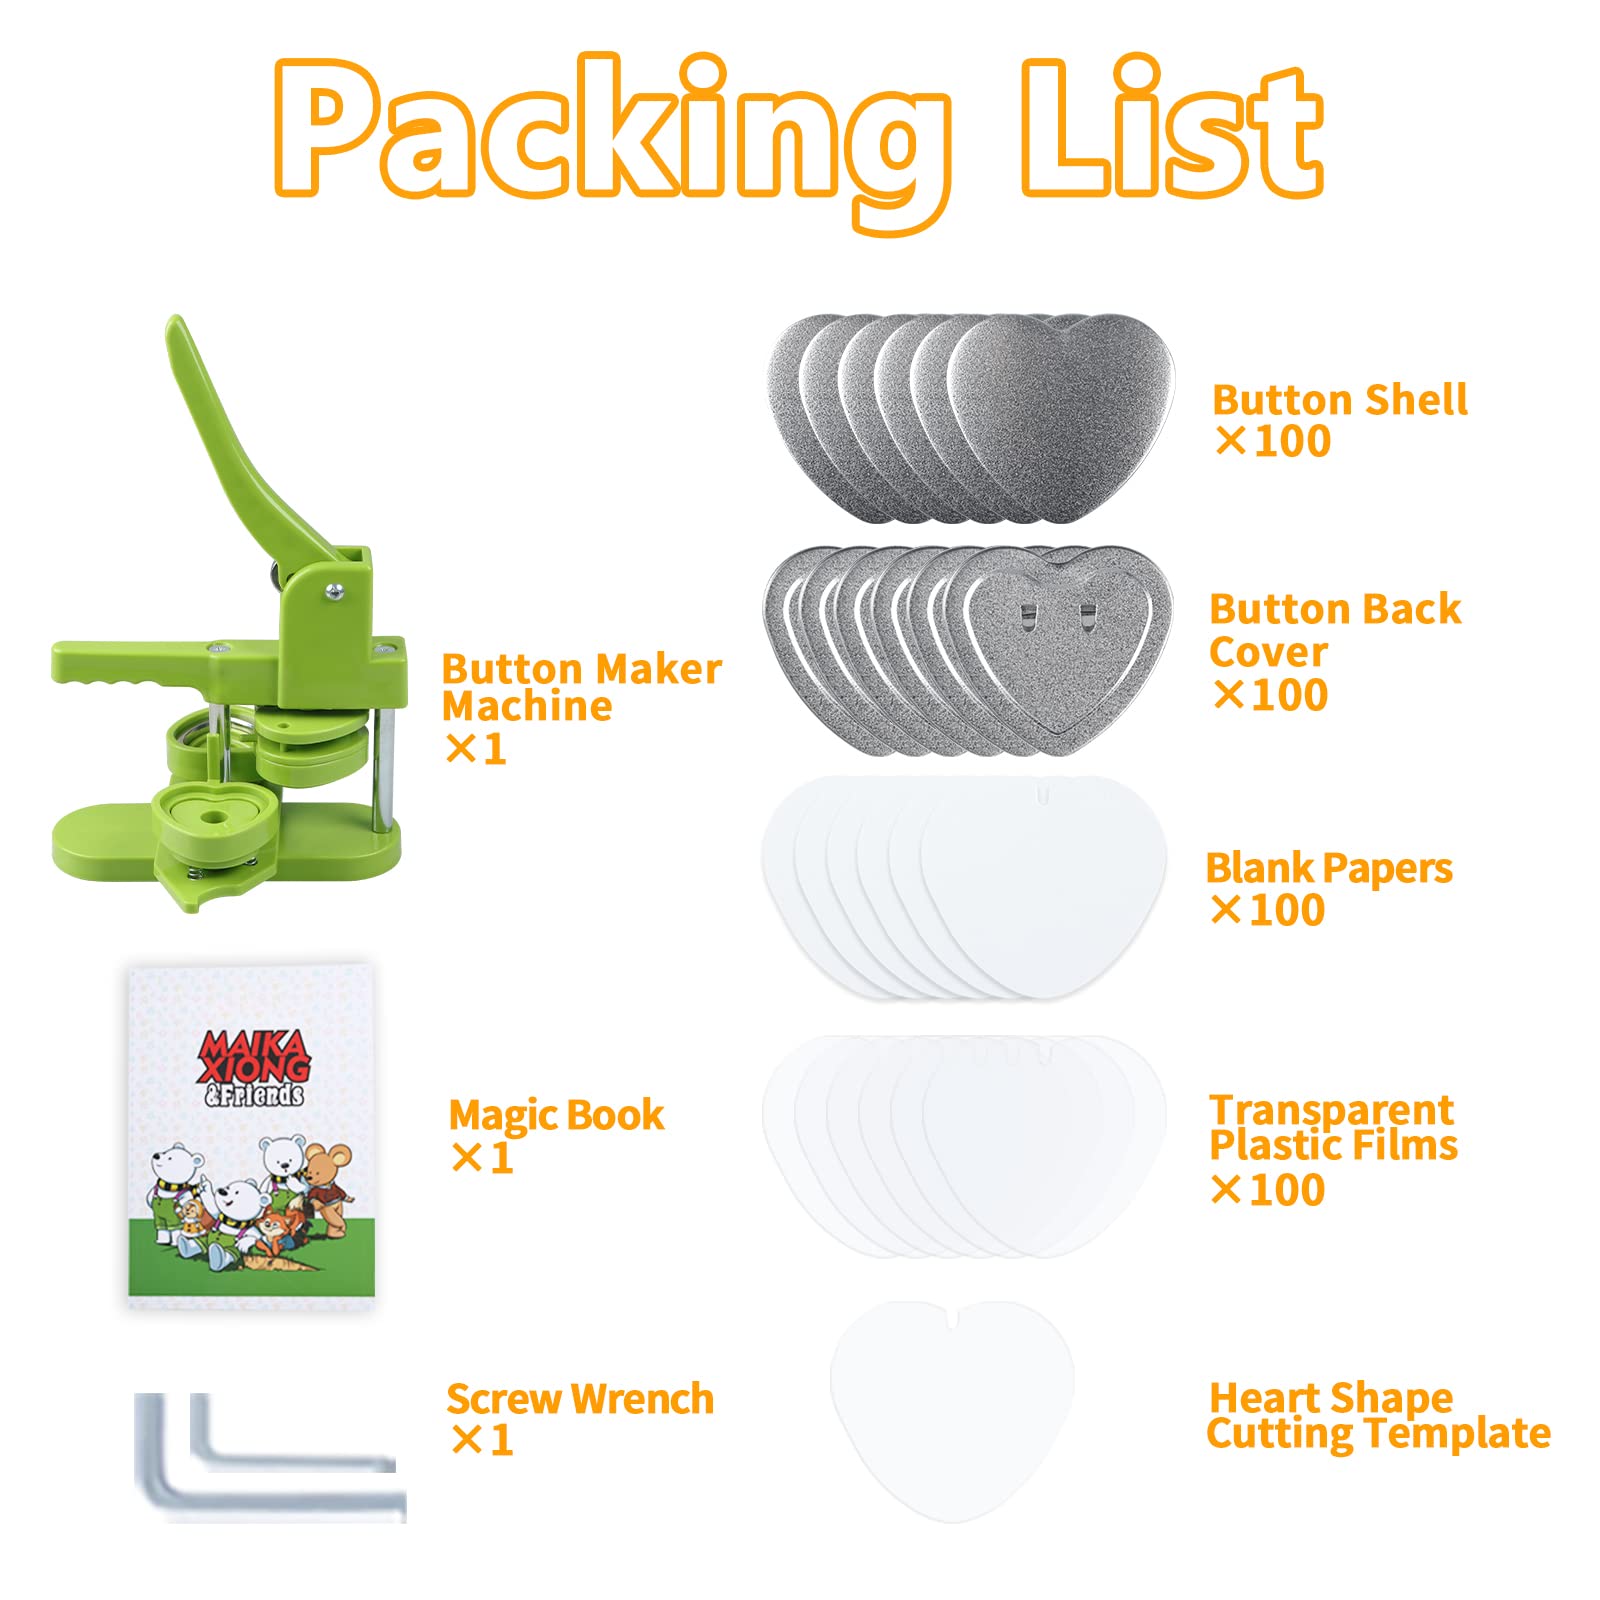
The Heart Button Maker Machine is a comprehensive DIY kit that includes a button press machine, 100 button-making supplies, a circle cutter, and a magic book. Designed for durability and ease of use, this machine features an upgraded swivel mount for precise button creation, making it perfect for both children and DIY enthusiasts. Ideal for various occasions, it encourages creativity and manual dexterity while providing a fun and engaging crafting experience.


M**E
It's not perfect, for sure.
It's super easy to use. The plastic parts that come with it are junk. But you can find metal parts that are better. That said, I cannot get it to seal the plastic film around it every time no matter what I try. (See pic.) Thinner paper, smaller paper, nothing. So... it makes sense this one costs less.I probably wouldn't recommend this for someone selling pins. But for personal use or kids... sure.I'm using the MK.Bear Button Badge Maker Machine 25mm (1 in).
H**R
Excellent & easy
This is super easy to use! I've made almost 70 buttons so far and only had one fail. An additional tip, if you're having issues: use a glue dotter or glue stick to keep your design in place, they can slip around in the mold if you're not careful.
J**P
Good for kids
Overall enjoyed the buttons, but on many of them the plastic overlay doesn’t seem to be as nicely applied/tight on the button. I can’t seem to figure out exactly what causes this as I’ve tried variations in pressure etc. My daughter who it was purchased for doesn’t mind however. Overall, I would choose a different product if you’re looking for high-quality results, but stick with this one if you’re not too worried about it.
G**E
Learnings curve ahead
This thing is awesome! So it arrived super fast, with everything it said it would have and nothing broken! It was super easy to figure out and use, buttons turn how beautiful. My only complaint is knowing exactly how to position the parts to insure your pin is where you want it when finished. I wish there were markings on it to help with that. Thankfully I only have 1 (my first one) that the pin is on the bottom rather than the top but after I learned this they turned out better. Unfortunately some are slightly off centered but I’m getting the hang of it and they still look great! The other thing I didn’t pay attention to was the pins themselves. I few of the backs pins had fallen out and I was in such a groove that I failed to look before pressing and now I have a couple buttons with no pin. I attempted to get the pin back in afterward but it’s pretty difficult and was starting to affect the design of the button. Over all I’m satisfied and already ordered more button supplies… hoping these do well at the makers market I’m doing this summer and I didn’t just waste money! Also, between the pins that fell out, the upside down button and a couple of the metal plates being stuck together, I was able to make 94 buttons… not a bad loss.
S**M
Great little machine!
This little machine worked great for various tabling events I have worked! I've had it for 6 months and used it on three different occasions.You can avoid jamming it by making sure you have only ONE plastic cover and ONE paper design (if you have two of either, that WILL jam it).Tip to help get your pin designs aligned correctly with the pin backs: without placing any pieces in the press, 1) On the side where you would place the plastic cover/design, make a small first mark with permanent marker on the rim of the plastic where you want the top of the design to be. 2) Swing the cover/design side underneath the press and squeeze down the handle. With the handle squeezed, make a second mark on the outside of the top press that moves down at the same place where you see the first mark on the bottom. 3) Then, swing the pin back side underneath the press and squeeze the handle again. Make another mark on the bottom of the pin back side to align with the second mark.All this will help you because the top press moves to a slightly different position when you squeeze it over the pin back vs. when you squeezed it over the cover/design. If you don't accommodate, your cover and pin will be slightly unaligned. Hope that helps someone!
I**C
It was awesome till it BROKE!
I make a lot of buttons for school shows, and have been using and enjoying this for 6 months. It’s lighter and more accurate than my old heavy duty red machine. But last night while making buttons in our theater lobby, one of the top disks split in half and went flying! Across the table. :-/My old metal red one misaligns 20% of the time but … in 9 years it hasn’t disintegrated.:-(
T**N
Ok button maker
Product would be better with instructions on use included /also broke with in first 15 minutes but still worked well. Once I figured it out, it was great with about only a 3% fail which wasn’t bad for making 300 buttons!!!!
P**S
my grandaughter is an artist and will use this to sell buttons for charity and to benefit herself
My granddaughter requested this for her personal use and to sell buttons for charity and herself. She specifically requested this kit
Trustpilot
1 month ago
1 day ago